
Tired of looking for the answer to the question of how to use a soil test kit? You must take quite a closer look at your plants in the event they are not prospering after you have done all the hard work.
It is possible that you did not recognize that the soils in which your plants are living are not that of that level having vegetative requirements. It is the thing that is essentially true for those plants that need various nutrients to build and live. Fortunately, it is straightforward to supply the lacking nutrients.
It is also straightforward to amend soils to give a flourishing and blooming environment for the plants to grow. However, you have to know what is required to know how to use a soil test kit.
You need to purchase a soil kit from your local gardening store, or you can buy that online to perform the job. To contemplate your soil’s chemical makeup and how this can affect your plant’s growth, you can make use of these kits as they are quick, simple, and easy to utilize. This article will get to know the significance of soil chemistry and how to use a soil test kit straightforwardly.
From Where Can You Purchase a Soil Test Kit?
You can purchase soil test kits anywhere from your favorite garden store, and these are extensively available online. Various soil test kits are where you can select one, like basic kits that offer color charts.
To get an electronic readout, you can also have an option of a digitized version. Price is the primary distinction between these kits. A cheap one will work great for you if you need a rapid outcome related to the essential nutrients so that you can determine how you can best amend and fertilize.
As all of these are giving identical readings, and in the event, you are on a budget, you can go for the kits that use chemical reactions and test tubes. In addition to this, it is quite exciting to perform this with children like a science experiment, and they can also observe what is happening in front of their eyes.
Distinctions in Soil Kit Test
To measure the soil’s nutrient levels, you can select from some distinct sorts of kits to know how to use a soil test kit. A cheap kit is usually a great place to begin, as already mentioned, for rapid and straightforward outcomes.
You have to go for some expert thing in general if you are facing ongoing issues related to your soil or are worried about other nutrients and minerals connected to the groundwater.
Test Tube Chemical Kits
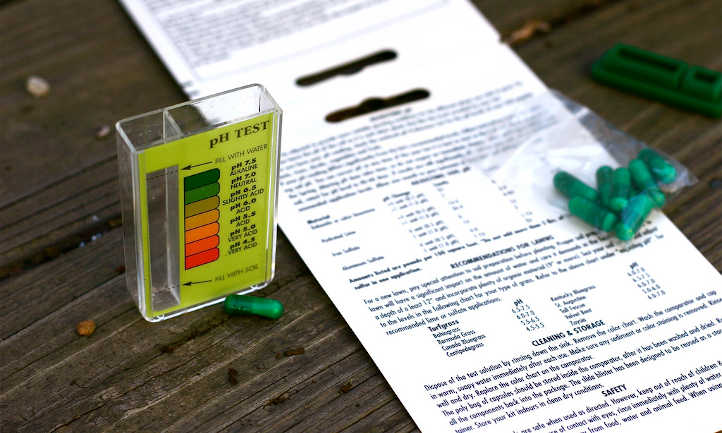
You can get these kinds of kits anywhere as these are the basic ones. You can have the ability to benefit from it as these come with several tests you include fertilizer, or get benefits from different seasons. Primarily, to get color-coded and rapid outcomes, you have to incorporate water, soil, and some amount of powdered chemicals.
In addition to this, you have to prepare the solution of soil 30 to 24 hours in advance. The time required for the solution entirely relies on the kind of soil you are working with.
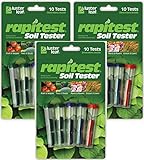
- (3 Pack) Luster Leaf Rapitest Soil Tester
- Economical soil test kit for testing soil pH, Nitrogen (N), Phosphorus (P) and Potash (K)
- Contains (10) total tests: (4) for pH and (2) for each of N, P and K along with color coded test...
- Simple, fast, and accurate results; no experience required to perform tests
Mail-In Kits
You have to send labeled soil to a lab, and in return, you will get your soil’s results as this is the requirement of these sorts of kits. Some of them permit for various samples, whereas some need a different kit for every sample.
In the event you are sampling various regions on the property, then this will get costly. You will get informative and detailed results with these sorts of kits compared to your own, and in the event there is a requirement, this mostly offers assistance for soil amending.
Expert Chemical Kits
You must have some general knowledge of chemical reactions and soil science to use these sorts of kits as its outcomes are very particular, detailed, and informative. These are the things that are utilized for soil testing building sites and assist with archeological sites, urban spills, and other details that can be resulted out by the soils.

- Contains components for 80 tests. 20 each for Soil pH, N, P and K
- Comes with sturdy plastic case
- Simple and detailed instructions included
- pH preference list for hundreds of plants included
- Tips for gardening and altering soil conditions included
Digital Meters
Digital meters are simple to utilize and are very quick. It would help if you stuck them in the ground. If you want to know your plants are receiving sufficient nutrients available, then these are very beneficial for a rapid assessment; otherwise, these just measure water and ph.
No products found.
How to Use a Soil Test Kit?
Well, it’s time to know how to use a soil kit with a step-by-step guide.
What are the Essential Things you Require?
Soil Test Kit – To know the answer to how to use a soil test kit. First, you need to have one.
You have to select a simple kit for simple results until you face substantial soil problems that you know.
You have to read the company’s guidelines carefully as most of the soil tests perform mostly the same. These mostly give indications that provide the exact results and guide troubleshooting and informative suggestions for the fertilization of particular plants. To prevent various mistakes that most people make, you will always find it useful to read in advance.
Distilled Water – you have to make use of distilled water and not well or tap water. The results will be affected by the water’s pH, giving the wrong details.
Soil Sample – You have to get samples from 6 – 12 inches below the soil’s surface for shrubs, trees, and perennials. Otherwise, 2-4 inches are enough.
Jar – You must have a container or closable jar of any kind.
A Garden Journal or a Notebook – You surely need to record and keep results on track if you utilize the time for soil testing. You will get some guesswork to know what the required steps are you must take for fertilization or healthier soils. Moreover, this will permit you to maintain the soil sample regions distinctively.
Step 1 – Take the Samples of Soil
Collect the soils from the regions that you want to test. For grasses and annuals, 2-4 inches below the soil surface are enough. You have to take soil from 6-12 inches below the soil surface for bushes, trees, and woody perennials.
Your results will get affected if you don’t remove the weeds, sticks, stones, roots, or any organic material from the sample. So don’t forget to remove these.
To get appropriate readings, you have to label a sample from every location to collect them from various areas. You can put the samples in plastic cups or baggies to organize these well in advance, and that can prove beneficial.
Step 2 – Make Water and Soil Blend to Set Aside
You have to make soil to water blend ratio with 1 part of the soil and five water parts to get a correct nutrient reading. If it’s feasible, then make use of distilled water. For at least 60 seconds, you have to shake it powerfully after putting it in a clean and sealable container.
Until the soil settles out from the water, you have to permit it to sit uninterrupted. This can take any time from about 30 minutes to 24 hours relying upon the kinds of soils. You have to make the water as transparent as possible, while cloudiness won’t influence the testing precision.
Step 3 – Take PH
To help set up the soil’s capability to hold nutrients, you have to take the pH levels first. You can perform this step at whatever time you like, and you will get the results in just a few minutes—no need to take a blend of soil and water from the previous step.
Step 5 – Take Potassium, Phosphorous, and Nitrogen
To measure these nutrients, all steps are the same.
- To fill the tube with water from the blend to the 4th line, use the added dropper.
- Put powder from the capsule into the tube.
- Shake it properly and permit it to sit undisturbed for 10 minutes to get a color.
- You can compare the color with the given chart in daylight having good lighting.
Step 5 – Keep Track of all the Results and Think about Fertilization or Soil Amendment if Required
It is always a fantastic idea to jot down all the results you got, as already mentioned above. In the event you are testing various regions, then it is particularly true.
However, in the event you are working with just one place,n it is still essential to keep track of records so that a comparison of results will be made after amending soil or fertilization.
Final Words
The soil in which the plants grow and prosper is wonderfully essential to their production and health. The plants that grow make use of available nutrients and, with time, will use up soils of what is being provided.
It is very significant to focus on the soils to include what is required for healthy vegetative growth as watering schedules and rainfall can deplete nutrients.
Hopefully, you are now aware of how to use a soil test kit with this fantastic guide. Soil testing is a straightforward procedure and offers a rapid indication of what you have to amend or require a more healthy soil environment.


Comments