
 By
By 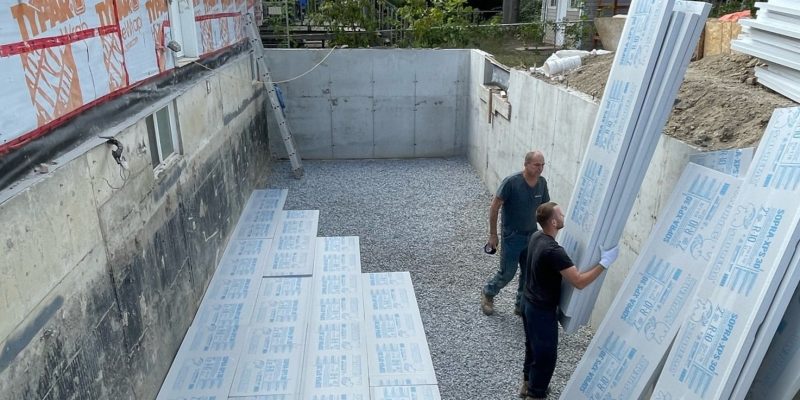
New insulated concrete flooring installation during a basement renovation
A basement renovation is one of the highest-return home improvement projects you can take on. Adding finished square footage below grade creates usable living space without expanding your footprint — and in cities where property values are high, the return on a well-executed basement finish can be significant.
But there is a step that a surprising number of homeowners skip: checking the foundation and drainage system before the renovation begins. Skipping this step is how people end up tearing out brand-new drywall twelve months after finishing because moisture was moving through the walls the whole time.
Why You Check Moisture Before You Frame
Framing, insulation, and drywall are moisture traps. Once they are in place, any water that enters through the foundation wall or floor is absorbed, held, and hidden. Here is the simple test: tape a piece of plastic sheeting to the bare concrete wall and floor, seal all four edges completely, and leave it for 48 to 72 hours. Condensation on the inside face (between the plastic and the concrete) means water is moving through the concrete itself — and that needs to be addressed before anything else goes in.
Foundation Warning Signs to Check Before Your Contractor Arrives
- Efflorescence — white chalky deposits on the concrete.
- Cracks at the wall-floor joint — the most common water entry point in residential foundations.
- Horizontal cracks in walls — can indicate lateral soil pressure.
- Staining or tide marks on the existing floor.
- A sump pit that runs frequently — if your sump pump cycles often, especially after rain, groundwater pressure may be higher than a renovation will accommodate.
What to Do If You Find a Problem
For homeowners planning a basement renovation Toronto projects often involve lowering the floor to gain ceiling height, or finishing an existing space. Either way, the time to deal with drainage and foundation issues is before the floor slab is poured and before any framing goes in — not after.
The Renovation-Ready Basement Checklist
|
Check |
What to Look For |
When to Call a Pro |
|---|---|---|
|
Plastic sheet moisture test |
Condensation under the plastic |
Any moisture between plastic and concrete |
|
Wall-floor joint |
Cracks, staining, or seepage marks |
Any visible crack or stain |
|
Wall cracks |
Horizontal, diagonal, or growing cracks |
Horizontal cracks or anything wider than 3mm |
|
Sump pump |
Pump condition, cycling frequency |
Pump older than 7-10 years, or frequent cycling |
|
Efflorescence |
White deposits on walls or floor |
Recurring deposits after cleaning |
|
Odour |
Musty or earthy smell |
Persistent smell even in dry weather |
Waterproofing as Part of the Renovation Budget
The smartest time to address drainage and interior waterproofing Toronto homeowners need is during a renovation — not after one. Once the floor slab is poured and walls are framed, adding interior drainage means breaking up finished concrete and removing framing. Doing it as part of the initial project costs far less and adds far less disruption.
References
- CMHC – Investigating Moisture in Basements
- National Research Council Canada – Building Science
- City of Toronto – Managing Water on Your Property










Comments