

The one thing in your garden or yard that experiences most of the gravity, pushes, and wind strokes are the gate. It is the most common thing found in your yard, and it also sees the most wear and tear.
The gravity pulls stresses the hinges and loosens the fasteners. Especially when it’s the wooden gate, the damage can be even more. It has more vulnerable areas than metal gates. Over time they can sag, fail to latch, or simply degrade with age. However, you can often repair a gate rather than replace it.
All you will need is a set of tools or, better, an Anti-sag gate kit, which includes cable, brackets, a turnbuckle, and fittings. If you are new to this and you have no idea as to how to fix a sagging gate, read this article till the end to get a complete idea of how you can do it easily all by yourself.
The Anti-Sag gate kit or Gate repair kit usually works for most gates, but still, you can check your measurements before starting.
Why is your Gate Sagging?
Yard’s gate sees a lot of action. Its repeated use, actions of gravity, or old age and cause your gate to sag. It is better if we determine the cause as it will easier to fix it that way. Below are some possibilities-
Loose or Damaged Hinges
Hinges have an important role in a well-functioning gate. Check if the hinges are bent or damaged in any way. If they are, remove them and replace them with new ones. Or they can be too small for the size and weight of your gate. You can also add a third hinge in the middle to increase the support.
To replace the hinges, unscrew it from the post and completely remove the hinge. Once done, you can now remove the hinges from the gates themselves. Now, measure and drill new screw holes in both the post and the gate and attach the new hinges.
Damaged or Deteriorated Gate Posts
If you are sure that the hinges are in good shape, you should examine the gate posts. After a proper inspection, you may find damage from insects or even rot in the posts. These problems can damage the overall integrity of the post and force the post to loosen in the ground, causing your gates to sag. If this is the case, you will need to replace the post.
For replacing the post, remove the old post and dig a hole for the new post. The new post should at least be 3 feet in depth to stay firm in the ground at a straight angle. You can use a hole digger to make this easier for yourself.
Now, set the new post in concrete, and with a time limit of 20 minutes or so before the concrete begins to dry, use a level to be sure the post is sitting at the correct angle. Make adjustments if necessary. Let it settle for a couple of days before re-installing the gate.
Gravity
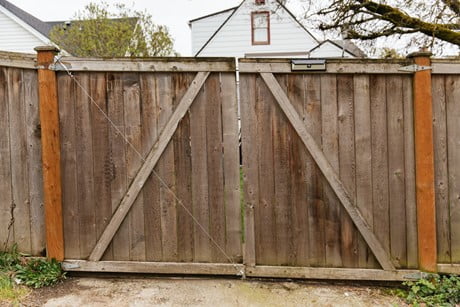
If you have determined that hinges or posts are not the issues, then the gravity is simply causing your gate to sag. You can use an Anti-sag gate kit to nicely realign your gate and lift the dragging corner off the ground in such a situation. The kits are inexpensive and can easily be purchased online or at your local hardware store.
Kit Components
The Anti-sag kit or gate repair kit contains:
- Two metal corner brackets with mounting nails’
- Two lengths of wire cable with galvanized metals U-bolts. These are used to attach one end of each cable to one of the corner brackets and the other end of each cable to the turnbuckle.
- A galvanized metal turnbuckle
How It Works- Step Wise Guide
Step1. Installing Upper Bracket
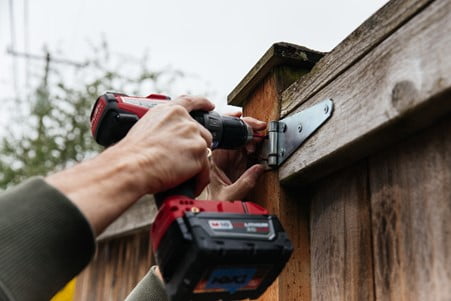
Screw one of the two brackets from the kit into place at the upper corner of the sagging gate on the hinge-side of the gate. Fix it to a sturdy part of the gate’s framework.
Step2. Installing Lower Bracket
Now, screw the second bracket to the lower corner of the gate’s frame on the latch side.
Step3. Placing Turnbuckle
Unscrew both ends of the turnbuckle to make it as long as possible. Now, hook one end through the hole in the upper bracket
Step4. Attaching Cable
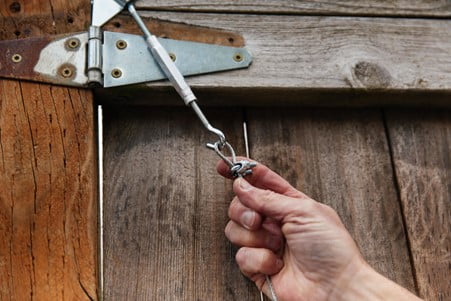
Using the cable clips, make a loop at one end of the cable to slip over the upper hook of the turnbuckle. Thread the cable through the hole in the lower bracket, pull it taut, and fasten it back on itself using the other cable clip. Use wire cutters to cut off the excess cable.
Step 5. Adjusting Turnbuckle
The turnbuckle has a hexagon cross-section allowing you to turn it with a spanner or adjustable wrench. Take up the slack in the cable by turning the turnbuckle by hand or with a wrench. Now, tighten or loosen the cable, ensuring your gate swings properly and latches easily.


Comments