

If you look a few years back in time or a decade ago, then the world will look more changed than anytime else. If you look ten years ago from that time, you will not see as much difference between them. This decade has seen a lot of inventions and new trends as well. This is not something new as new trends always at a time before then the whole ones.
Among all the inventions and trends, what has become most adopted or most liked will be gardening. People have started gardening around them. But, as we all know that things change accordingly, and over time, gardening has also gone through a lot of changes.
Indoor gardens are the new term you would have heard about just recently. But what is happening more is bottle gardening and bottle tower gardening.
In this article, we will discuss the bottle tower garden, including some tips and tricks. We have come across many things while researching bottle tower gardening, which we will deliver to you after filtering them.
This will give you a better insight into bottle tower gardening. You will learn more about it so that you do not have any difficulties while growing one or two for yourself.
Another thing to mention here is that bottle tower gardening is a subtype of bottle gardening. If you want to grow both, you can see a difference in height and number of bottles only. So, read the following article to enrich yourself.
What is a Bottle Tower Gardening?
Its name says it all, and most people guess it right, and we are sure that you also have guessed it right. Some people are restricted in space, but they are natural and want to stay close to it. For them, these kinds of gardening ideas have been a blessing.
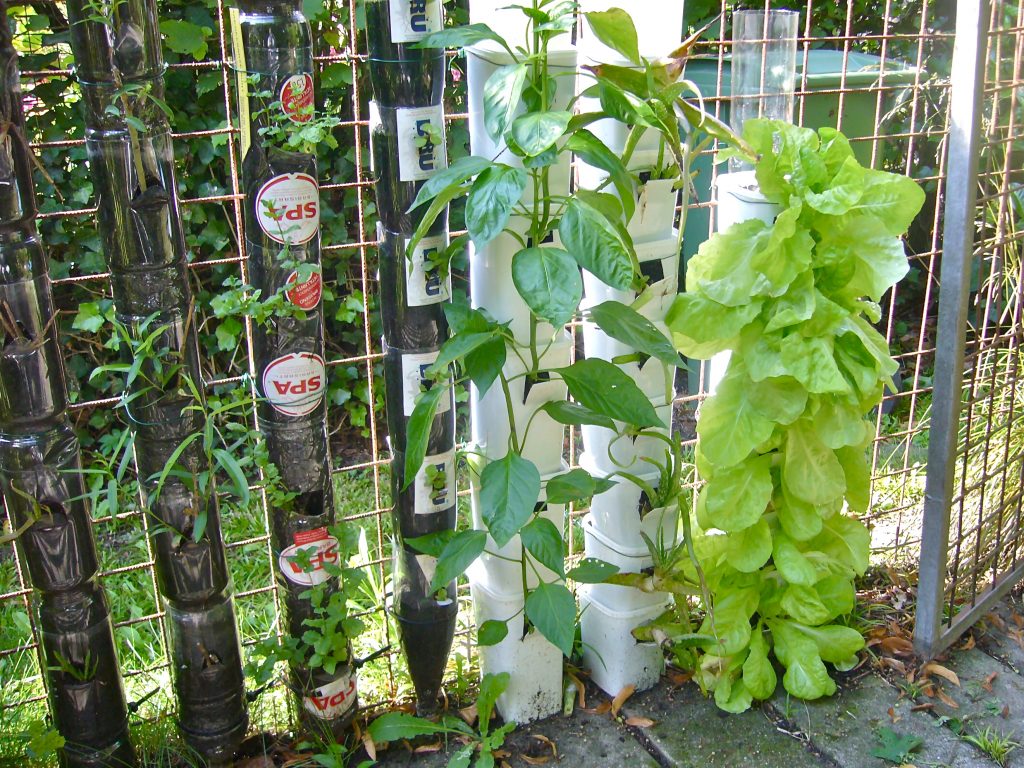
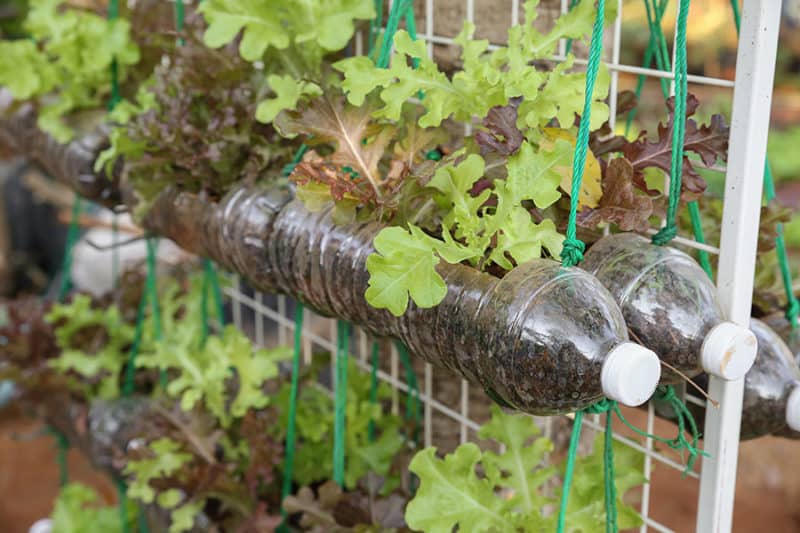
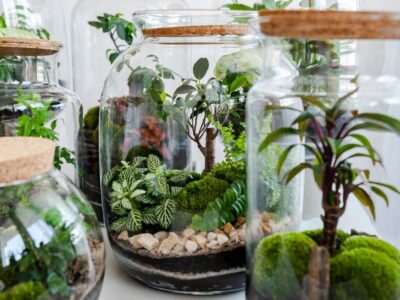
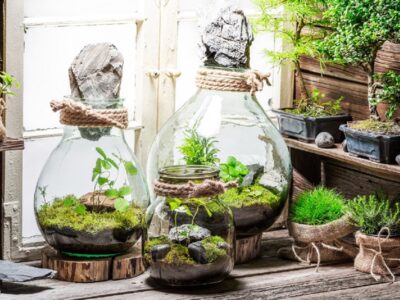
Bottle gardening is a method in which you provide everything a plant needs to grow in a bottle. The bottle can be of either plastic or glass. It does not matter. Similarly, bottle tower gardening is a method in which bottles are lined or hooked or tired one upon another to form a tower-like structure. In this structure, different kinds of plants were planted, and different seeds were sowed.
If you did not have much space in or around your home to afford a garden, then this bottle tower garden may become a great source of enjoyment for you. You can place it anywhere you want, and it will also not take much space.
One of the exciting and best things about bottle gardening or bottle tower gardening is that they are almost maintenance-free. So, once done or installed, you do not have to worry much about your bottle tower garden as they can do their maintenance by own.
Bottle Tower Gardening Method
The method of growing a plant in your bottle tower gardening requires care and alertness; otherwise, and you will end up ruining your bottle tower gardening approach. Therefore, we have simplified the work for you and have gathered some simple and easy to understand step for you. So, go through them and know how you can install your own beautiful bottle tower garden.
Requirements
To make a bottle tower garden, you will need a lot of bottles. Remember, the size of the tower depends on you so, take the number of bottles accordingly. After the bottles, you will need scissors to cut through different shapes and sizes.
A sharp and resistant tool will also be required to poke through the bottles so that you can tie them up and hang them. All these, you will need a thread or some wires to ties the bottles together.
These were the things you may have inside your home, but you must go out for the remaining requirements. Go and get some sand for your plant with some fertilizers and manures as well. You will need different chemicals as well so that your bottle tower garden blooms up quickly and effectively.
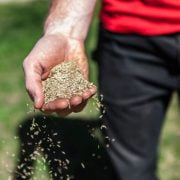
Step 1: Select the Plants of Your Choice
Make up your mind on what you want to grow. We often do not think about this, and then at the last time, we all do rush, which is not acceptable behavior.
Step 2: Make the Last Firstly
Take your bottle and cut it from just below the label. After cutting the bottle from the bottom, you will have the bottom or base of your bottle tower gardening. Remember, you should have removed all the labels from the bottles as you do not want to have labeled drinks on your bottle tower gardening.
Step 3: Drainage Holes
Now, take the remaining part of that bottle, the base you had used for the bottom. Take the ruler in hand and measure a 3 inches distance from the neck of the bottle. Now, use either scissors or sharp tools for piercing to poke around three dots. These dots will be the site of water drainage. Make the whole a bit wide, almost the diameter of a sketch pen.
Step 4: Bring in the Soul of Plants
Now, it is time to add soil to the bottom of your bottle. You can use your garden soil, or If you do not have any garden, you can buy different composite and fertilizers. There is e a variety of beginning soil that comes in the market. So, make sure that you treat your bottle tower garden special.
Step 5: Put the First Piece of Structure
Now we are almost done with the base of our bottle tower gardening. Once you fill the bottle with compost, it is time to fix it at a suitable place. It can be a wired fence, wooden fence, or metal chains, and you must put water all over it to make it clean. Remember, the soil should not be filled to the top. Keep almost 2 inches of area empty from the soil in the bottle.
Step 6: Make levels
Take bottles according to your choice. Cut it in two, as we mentioned in step 3. Fill it with sand and make sure that the caps are off from the bottles. After filling the sand, repeat step 3 and then place it over the bottom of our bottle tower base and tie it to the structure using wire or thread. Ensure that the tie knot is strict and demanding so that the structure of your bottle tower gardening does not wobble.
Step 7: Watering Funnel
Once you are done doing those sand filling and piercing work, you must make a water tank system. No, not for your house! This will be for your bottle tower gardening. Take a bottle and cut it in half. This is going to be shorter than other bottles due to its height. For this bottle, you do not have to remove the cap.
Step 8: – Poke a Hole
Use a very sharp object that can be either scissor, nails, cutters, or something similar with sharp blades. Poke and make a hole on the cap of this bottle. The size of the hole matters as this is going to be the funnel of our system.
If the size is more than enough, water will flow over and rotten the plants, but if not enough supply was provided, your plant may shrink and become dull. Therefore, the purple color will be more than enough.
Step 9: Place the Last Unit
Now, place the cap right on the bottle and place that bottle on top of your bottle tower gardening structure. Make sure that it fits perfectly over it and stays there without wobbling.
Step 10: Place the Tank
Make a similar bottle like a funnel, and this will be the topmost of your bottle tower gardening structure. If somehow any of the components of your bottle tower gardening wobbles, then you can tie them up as well. Do not go more than 4 to 5 components.
Step 11: Make Way for Seeds
Take a marker and, leaving the top two section and bottom last section, make 3 to 4 squares on each soil containing structure except the bottom one. The dimension of squares can be around 1.5 to 2 inches. After this, take a sharp blade and cut out those squares.
Step 12: Sow Seeds
Now, flip out those cut squares and from there, put your finger in and make a hole in the soil from each square. In those holes, put the seeds of your desired plants, or you can also put seedlings into them.
Step 13: Water Supply
Once you are done sowing the seeds and seedlings, it is time to water them. Do not just put water on every section; instead, put it in the top from where the water will travel across the bottle tower seedlings to the bottom slowly.
Step 14: Wait and Watch
Now, you must wait and watch your seeds grow and become fresh and green vegetation. Do not forget to take care of it as water replacement is a task which almost all of us forget about. Therefore, be careful and be caring as well.
Conclusion
Making a bottle of tower gardening is not a challenging task. If we do it slowly and without worrying, we will be able to make something remarkable and elegant.
As this process requires many bottles, it will be tough to get all those bottles, especially of the same size.
Therefore, it will require some significant effort from you, but only in the beginning and after that you do not have to do much about it.
As your bottle tower gardening will always be hydrated and in moisture, there will undoubtedly be molds and mildews.
So, be careful of them and do not forget to change water frequently.


Comments