
I have seen some of the cutest chalkboard labels on the large jars in kitchens from other creative blogs, also about the best above ground pools. It inspired me to go out and find the large jars for my kitchen counters.
Most of the chalkboard labels that I have seen made was by using the chalkboard paint. Although that is a great method and more than likely over all less expensive,l like using best zero turn mower for your big lawn. I did see someone who used chalkboard contact paper and I decided I wanted to try that.
I searched local stores and called all around but did not find any stores that carried the blackboard or chalkboard contact paper. I ended up finding it online and purchased it there. I then went through the same thing with the chalkboard markers. I also ended up purchasing them online.

Here are the link for the chalkboard contact paper Chalkboard Contact Paper, 18″ x 6′ and here are the markers I used Liquid Chalk – Works like a Marker Dries like Chalk – Set of 8 Earthy Colors . Since these were hard for me to find, I thought I’d make it easier for you. But just so you know I did go ahead and set them up as affiliate links with amazon – I keep no secrets from you guys. I also went ahead and posted the widgets on my sidebar for you if you want to come back to them later or send a friend to find them.
I bought my jars at Walmart for the 1 gallon jar which I paid $6.97 for and the 1/2 gallon jar which was $4.87. But the 3 gallon cookie jar which I’m going to also show you I got at The Container Store and I paid $19.99 for that! I know… crazy difference, but I wanted the larger size and Walmart didn’t have it. (I have since seen the 2 gallon jar at Walmart and it was I think only $9.99 – ugh)
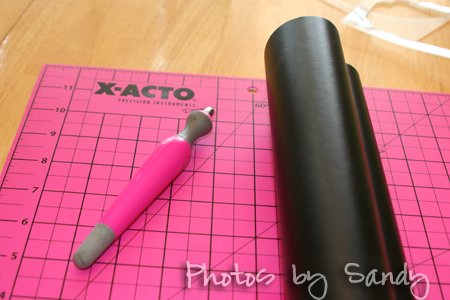
I also got out my x-acto cutting mat and knife so it made a nice clean cut. (I won these in a prize pack from an Elmers Challenge and they are awesome!)
I decided on the shape for my labels. That came down to which stencil I had! lol
So I went to work. I made sure not to waste any of my chalkboard contact paper, so I cut as close to the edge as I could.
stencil
Once I had cut out the pattern I decided on which marker I was going to use. I picked the yellow because it showed up nice and bright. These markers are pretty cool. You shake them up and then you have to hold them down for a little bit (longer than I expected, I thought at first they weren’t working – but like a minute or two before the tip fills with ink)
chalkboard markersI also decided to put the little dots on the edges of my labels. DaNita from Delightful Order always does that on her printed labels and I think they look so cute. (of course I messed up a couple, so practice spacing!)
Then I just peeled off the back and placed them on the jars. I started from the center and pressed down and wiped out with my finger to make sure all the air was out and it was pressed firmly down.
I did this for all of the jars. Here are the three smaller jars.
chalkboard labels on kitchen jarsFor the cookie jar I wanted the label to be a little larger since it was twice as big, but I didn’t have a larger stencil with the same design.
It was nice that there was a grid on the back of the contact paper, as I just free handed outside the line where I did the stencil to make it larger.
You may think that it seems strange that I did not do the traditional Flour & Sugar canisters.
The flour and sugar are not things that I use everyday in this house. I actually don’t use the flour very often at all… (can you say box mix?).
But…. my husband makes his bowl of oatmeal every morning and puts brown sugar and raisins in it. So it only makes sense to put this in the jars.
oatmeal and brown sugar
I considered getting a smaller jar for the raisins too… but I thought it might end up looking too crowded in this space on my counter. The refrigerator is directly on the left and the stove is just on the other side of the coffee maker. So his raisins are in the cupboard above.
kitchen canister jars
cookie jarCan you believe there are four different bags of cookies in there? Well…. there are actually two of the four that only had part of them left. But there is still more room in this for more!!
chalkboard label for cookie jar
My only concern for these darling jars is that there is no rubber seal. So I am hoping the cookies don’t get stale this summer. Sometimes looks out weigh the practicality right?
If you have already made some kind of labels for your canisters I’d love to see them!
I’d love for you to link it up to my Organizing Mission Monday Link Party
It will be open until April 9, 2011, but don’t worry, if you finish your kitchen, pantry or label projects after that… my link party is always open to any of your organizing projects!

Comments