
With the pandemic and lockdowns forcing us to spend most of our days at home, we are more aware of how we live, especially in our home. And that ultimately leads us to improve our living conditions and ensure proper maintenance of our home. When it comes to maintenance, both the exterior and interior of your home require equal focus. However, there are some areas in your home that deserve regular maintenance, especially the exterior ones. Out of all the exterior features of your house, the deck might be the most exposed one- it has to bear the brunt of sun, rain, and snow.
If you already have a deck in your house or plan to build one, you need to learn how to maintain it first. Staining a deck is the most basic way to keep up its appearance and durability. Let’s learn how you can stain your deck to keep it in pristine condition.
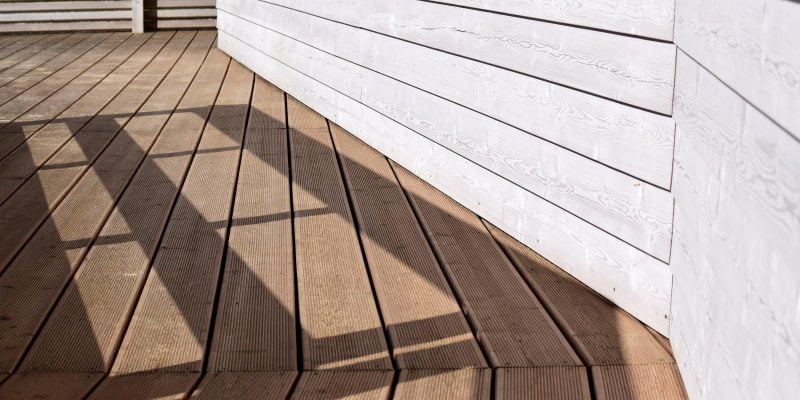
Inspect the Deck
If your deck is an old one and has some good years behind its back, you need to thoroughly inspect its condition before deciding to stain it. Years of wear and tear can take their toll on the deck, and sometimes the damage is not apparent to the eyes. For a comprehensive inspection, walk around the deck and put pressure on the boards with your feet. Check for loose boards. You should also look for-
· Broken screws or pegs
· Broken or chipped wood
· Nails peaking through the wood surface
· Broken wood edge
· Warped wood
· Signs of Mold attack
· Signs of Termite attack on the wood
After the inspection, replace the boards that you find broken or damaged. Depending on the scale of damage, you might have to repair a portion or even the entire deck. However, if you keep up regular inspection, you might get a chance to prevent the damage before it gets out of hand.
Gather Your Materials
After a thorough inspection, it is time for you to prepare the deck for staining. And you need certain tools and materials for this. Ensure you choose an environment-friendly deck stain compatible with your deck wood. You can check the woodworking toolkit for the best deck stain reviews. Make sure the stain doesn’t contain any toxic elements; it can harm your pets or even you.
Here’s a comprehensive list of things that you will need for staining your deck-
· Deck stain
· Pressure washer for cleaning
· Broom
· Washcloth
· Deck cleaner
· Paintbrush- 3” or larger
· Paint tray
· Paint pad
· Gloves
· Paint tape
· Paint pole
You might find most of these tools already available at your home, for instance, gloves, a paintbrush, or a pressure washer. But you might have to buy the deck stain and other chemicals.
Clean Up the Deck
Before moving on to the actual staining, you need to prepare the deck, just like preparing the surface for a painting. Proper clean-up is essential for the deck stain to get soaked in the material and give it a finished look. Depending on the deck condition, you can use deck cleaning chemicals or simply a soap water solution.
The cleaning procedure itself is simple but quite laborious, especially if the deck is a large one. First, you need to sweep the surface to clear up dust and debris. Pay special attention to the cracks and crevices where dirt can accumulate. You need to apply the cleaning product on the deck and scrub it hard with a stiff-bristled brush. To avoid back pain, follow the same pattern of motion with the brush. After the scrubbing, clean the deck with a pressure washer. Let it dry completely before moving on to the next step.
Sanding
If your deck already has a painted surface, you need to sand it off before applying any fresh coat of stain. Otherwise, the stain will not set properly over the previous paint. Sanding is also required if your deck is sun-damaged or rough from wear and tear.
Protect Exterior Wall, Trees, and Furniture
Apply painter’s tape along the periphery of your deck to protect the exterior walls. If you can’t manage painter’s tape, you can also use a plastic sheet to cover the edges. Remove all plants or furniture from the deck. If they are fixed to the ground, you can cover them up with more plastic sheets.
Add the Stain to the Paint Tray
Before you add the stain to the paint tray, make sure you stir the stain bottle properly. However, don’t shake the gallon; bubbles will form in the stain.
Stain the Deck With a Paint Pad
After applying stain to the paint pad, attach the paint pole to the pad. Move the paint pad across the deck board and stain it. Once you are finished with a board, move on to the next. If the gap between the board remains unstained, use a paintbrush to manually stain those areas. If the coating seems thin, apply two to three coats of stain for a better finish.
Instead of a paint pad, you can also use a paint roller or large paintbrush for staining. However, this might require more time and might not turn out with precise workmanship, which a paint pad can deliver. Don’t let the excess stain gather as a puddle on the deck surface; smooth it over before it can dry.
Let It Dry Properly
After you finish staining the entire deck, you need to let it dry for at least 24 hours. Don’t drag in your deck furniture or plants if the stain is not dry. After the stain has dried, remove the plastic covering and painter’s tape from the edge of the exterior walls.
The Bottom Line
Staining your deck will serve you three purposes at once- it will extend the longevity, enhance its appearance, and it can substantially boost the property value of your home. If years down the road, you decide to sell your home, you will thank yourself that you put some effort into maintaining your deck. Try complete staining of your deck every two to three years, and maintain regular keep up in between. And don’t forget to check the weather before you undertake your deck staining project. You don’t want the deck staining to get disrupted by rain halfway through the process. Besides, you need a good dose of sunlight to make sure the stain dries properly.


Comments