
Many indoor plants are grown from bulbs, stems, or tubers. If you choose to grow a flower bulb indoors, it can be a significant part of a centerpiece in your festive decorations.
When they bloom, they add some cheer and color on a cold winter morning.
This is a cost-effective way to decorate and bring fragrance into your home.
The key to growing bulbs indoors successfully is to plan. Many people do not know that there are two types of bulbs for indoor growing: bulbs that need to chill and others that do not.
Types of Growing Bulbs
Bulbs That Need Chilling
Some bulbs flower during spring and require a chilling period before blooming. This category includes the Dutch iris, tulips, daffodils, crocus, etc.
A period of cold temperature stimulates a biochemical response inside the bulb, which results in turning on the embryonic flower, and it starts developing. Bulbs usually require 16-18 weeks of cold before the flower is fully developed.
After the process, they are ready for light and warmth. If the cooling time is reduced, the flowers may emerge, but they will probably be deformed.
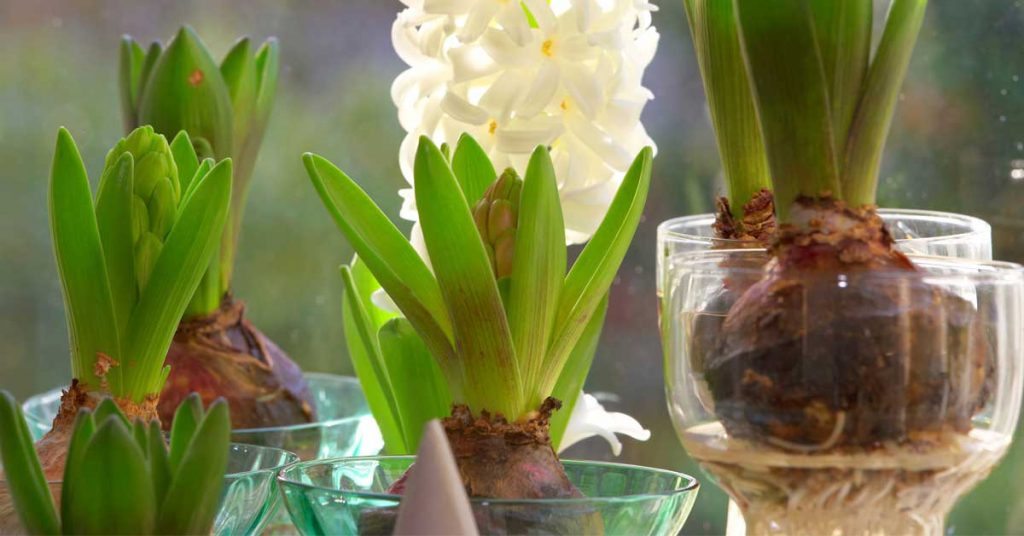
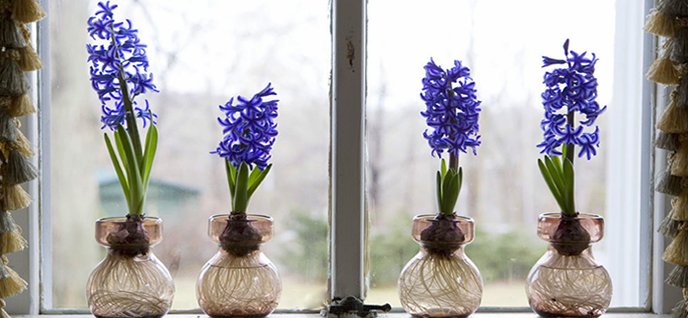
This technique is called “forcing.” Bulbs are coaxed into early bloom indoors. The easiest bulbs to grow indoors through forcing are crocus, hyacinths, and mini daffodils. Tulips can also be forced, but they require careful attention.
Bulbs that Do not need Chilling
A few bulbs are native to warm climates and do not require a cooling period to trigger blooms. Amaryllis and paperwhite narcissus belong to this category.
Paperwhite bulbs can be planted or placed in a shallow bowl using pebbles to hold the bulbs in place. You need to add water, and they will start blooming four weeks after planting.
For the first two weeks, please place them in an area with indirect light and a temperature of about 50-degree F. This keeps stems short and sturdy.
Paperwhites offer beautiful fragrances and look fantastic. Amaryllis bulbs should ideally be planted in a pot filled with soil with about one-third of the bulb above the soil. Place the pot in bright and indirect sunlight.
Amaryllis can add many exciting colors to your garden. There are white, pink, peach, red as well as green flowers.
While growing bulbs indoors, it is best to take hardy bulbs that have been grown inside the house to the garden after they flower. You cannot rely upon them to have good performance once they flower.
The more tender bulbs can be kept in the house for flowering if you take care of them.
How to Choose Bulbs to Grow as Indoor House Plants?
Some people prefer going to the local garden center to buy bulbs. Buying bulbs from the catalog and planning on what to do with them is fun.
Bulbs usually arrive in the perfect growing condition when bought from outside. Just make sure to go early in the season if you are willing to buy from your local retailer so that you can select the best and fresh bulbs.
Always pick out bulbs that are firm and display no sign of damage.
Things you Will Require for Growing Bulbs Indoors
Planting Container
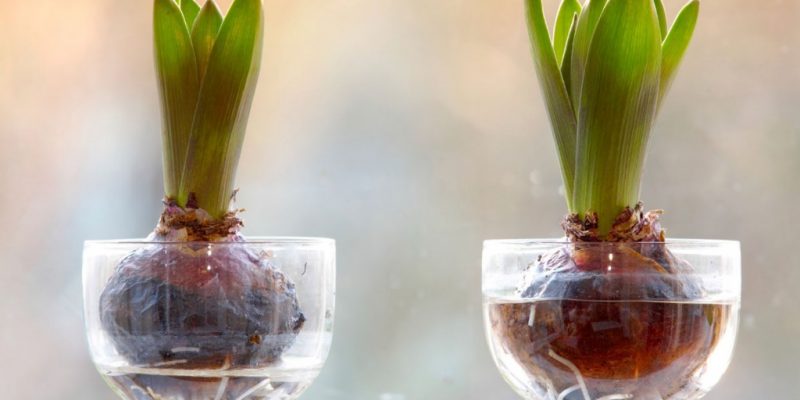
You can plant bulbs in unique and exciting containers. They can be grown anywhere – in the planting compound, in rocks, or just shallow water.
So, you can get creative and decide to show them off. You can use old teacups, buckets, utensils, flowerpots, water pitchers, and dishes to plant them.
Potting Soil
Potting soil is used to keep the environment moist for the bulbs so that even if you forget to water them regularly, they will work fine. But you can also use rocks or just water to force the bulbs.
Growing Bulbs Indoors
You can follow the steps described below and brighten up your home this winter by starting your bulb garden.
Step 1 – Choose your bulbs
As mentioned earlier, daffodils, paperwhites, hyacinths are excellent candidates for growing indoors.
Before choosing a bulb, you need to know what kind of care and how long they take to reach a blooming stage so that you can plan accordingly. Always look for healthy bulbs and do not have breaks, cuts, or any rot.
You can also keep them for up to a year if you store them properly. Tips for proper storage include storing them in a container with dry materials and a cool place.
Bulbs have everything they need to grow. They are a storehouse of nutrients and do not need much care before or after planting. It would help if you remembered that different bulbs require different care and bloom at different times. Here are some examples-
Crocus and Hyacinth: These are the earliest bloomers and must be chilled for 12-15 weeks. They can then be planted in soil or water. Once warmed, they are expected to make an appearance in 2 weeks.
Garlic and Onions: These can be grown any time of year and are very easy to propagate indoors. They usually need a deep pot but are easy to transplant outdoors or into an established garden. They prefer the sun to finish off their harvest, so make sure to keep them in a warm environment as they start maturing.
Amaryllis: It has a large bulb and even larger plant, so make sure you have a decent-sized pot and room for them. You will also need to provide support for the stalks so that the heads’ weight does not tip them over.
Buds will begin to show in 4 to 5 weeks, with blooms to follow. Remember that this plant is very fond of the sun and can handle a warm climate, unlike most other plants.
Daffodils and Tulips: Daffodils need to be chilled for 16 weeks and tulips for 14-20 weeks. They will bloom within 2 to 3 weeks later. You can add different colors and sizes. Their bulbs are more extensive, so grow them in a larger pot if you decide to mix and match.
Step 2 – Provide a Cold Environment
You are tricking your bulbs into thinking that the winter has come and passed, so you need to provide them a cold environment. You can store them in the refrigerator, sheds, or garages that cool off.
Temperature between 35 to 50 degrees is ideal. You can also chill your bulbs after planting in the containers in the soil.
Step 3 – Choose the Containers
Provide the correct sizes of containers for the bulbs you have chosen and enough room to grow without overcrowding. You can either stick with traditional pots or mix and match your containers and use different colors and fragrances to beat the winter blues. Bulbs look elegant when planted in decorative rocks.
Step 4 – Plant Bulbs
Always place the bulbs no more than an inch away from another when planting them. Plant as many as you can in each container. If you can settle them on rocks or vases and using only water, allow the root tips to reach the water.
Step 5 – Provide Light and Water
Put the planted bud where they can get plenty of indirect light and keep the soil moist. Do not place them under direct sun (unless they require added heat) as it may warm them too much and interrupt blooming. Cooler temperatures allow blooms to last longer.
Maintenance
To increase the bloom period once they appear, plants should not be placed in direct sunlight.
Do not keep them near heating vents. If you have chosen growing bulbs in water, replace the water every three days.
Generally, no fertilizing is required while forcing because once bulbs are finished blooming, they do not re-bloom.
However, it is possible to get bulbs to re-bloom by fertilizing the plant after it finishes blooming. This should be done while the foliage is still green.
Growing bulbs indoors is fun, and you should give it a try at least once. You do not have to be a pro gardener, follow some simple steps, and take care of the bulbs.
Please sit back and wait for the greenery to appear, and once you see those beautiful blooms, all the effort will be worth it!


Comments