
Automated sliding gates are a delight to watch and have a lot of advantages over the swinging gates.
But if you think installing them is a mess, then hold on because this opinion is disputed by reality.
Here is a step-by-step guide to making your work easier. Let us get started.
Tools Required
- Electric or cordless drill (preferably with clutch control)
- 5/16 tek socket
- Shovel
- Crowbar
- String line
- Spirit level
- Tape Measure
- Hammer
- Spirit Level
- Pencil/Marker
- Wheelbarrow
- Cement
- Clamps etc.
Before You Get Started
The sliding gate must have either a concrete strip or sunken beam for the gate track to be bolted to and allowing the perfect working of the sliding gate.
Two gate posts and a 75mm x 75mm guidepost are also needed for the guide block to be mounted.
Follow all the safety precautions mentioned in the guide manual and ensure that the motor power cable is not plugged at any stage till the set-up is completed.
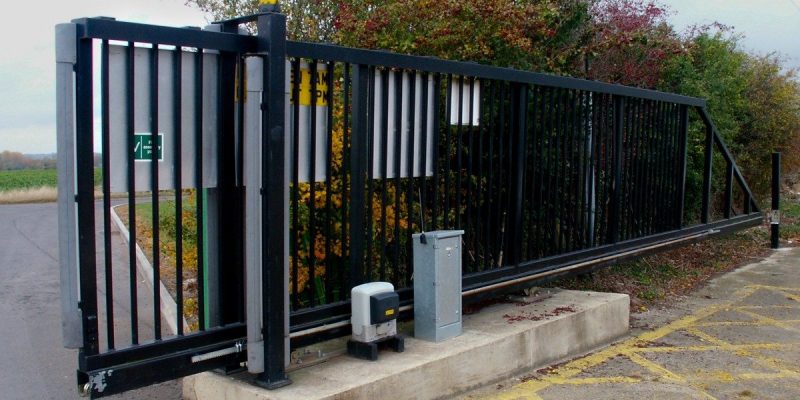
Step 1: Gate Preparation
Make sure that the sliding fence gate is correctly installed. Check that by moving it to and manually. Wheels and guide rollers should be rotating smoothly and be dust-free. The track should be flat, level, and firmly affixed.
Step 2: Motor Pad Footing
The motor pad footing area should be at least 450mm long × 300mm wide. It requires a minimum depth of 200mm too. The surface should be made of concrete and must be cemented. Make sure the surface is parallel to the driveway.
Step 3: Motor Position Installation
- Insert the key and open the manual release bar to put the motor into manual mode and check that the motor cog rotates freely by hand.
- Place the motor and motor mounting plate on the concrete pad.
- Mark all four outside corners of the
- the mounting plate on the concrete pad.
- Remove the motor from the mounting plate.
Step 4: Drilling holes for Anchor Bolt
- Ensure the mounting plate is positioned within the marked corners.
- Proceed to mark the positions for your anchor bolts ready for drilling.
- Remove the mounting plate.
- Using an M12 masonry drill bit, drill holes of at least 120mm depth.
Step 5: Mounting the Motor
- Fit motor mounting plate back into place and fit and tighten anchor bolts.
- Fit the motor back on the mounting plate and make sure the power cord is positioned into the end slot of the mounting plate in the PowerPoint’s direction, making sure there are no pinch points.
- Slide rubber grommet along the power cable and into the end slot of the mounting plate.
- Bolt motor to the mounting plate using the M10 × 50mm bolts with spring and flat washers provided and tighten as required.
Step 6: Gear Rack Installation
- Put the motor into manual mode and confirm that the cog rotates freely by hand.
- Ensure motor cog and gear rack are suitably aligned and has a clearance of 1-2 mm at least with gate drive cog. The Gate motor drive cog must not carry any weight of the gate.
- Adjust the height of the rear rack if the gate does not slide freely by hand.
Step 7: Set the Limit Travels Stop
The two-limit travel stops included in the gate motor kit are designed to set your gate’s opening and closing position as you want.
The limit travel stops meet the spring limit switch and do the job done for you.
Step 8: Powering the Motor
- Make sure that the gate can move manually before powering up the motor. (key unlocked)
- Slide the gate to between the middle of the posts.
- Lock the key in readiness for automatic mode.
- Plug the power cord into an approved RCD protected outlet.
- The remote included in the kit is factory paired ready for use.
Start the gate in the open position.
When you press the remote, the gate starts to close and stops finally when the limit travel stop hits the spring limit switch.
You can adjust this as per your convenience.
Good Luck


Comments