

Vinyl sheet flooring can be a good solution when you need a new floor.
Not only is it available in a wide variety of styles and looks. It’s also simpler to install than other types of flooring.
Here’s a look at how to go about the installation process.
Find the Right Flooring
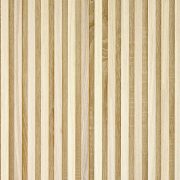
First off, you need to find the right vinyl sheet flooring for your needs.
In addition to looking at the aesthetic qualities of the flooring, you should look at its durability.
It’s important that you buy good quality vinyl sheeting that will last for years. Thankfully, you can find quality vinyl sheet flooring, and many other types of flooring, for affordable prices at home improvement stores such as those at Empire Today. While not recommended, you can also find them online if you really can’t make it to the shops!
Remove Obstructions
The first preparation step is to remove baseboards, moldings, and any other obstructions.
You’ll then have a clear space in which to lay your vinyl sheet flooring.
Cut Under the Door Trim
You also need to cut under the door trim to ensure your door opens well once you have laid the vinyl sheet flooring.
Typically, you should cut under the door trim by 1/8 inch using a multi-tool fitted with a wood blade.
Alternatively, you have the option of removing the door trim and reinstalling it after you have laid the vinyl flooring.
Of course, you could simply buy new doors for your space. If you decide to go down that route, check out these helpful tips for installing doors.
Prepare the Subfloor
The next step is to prepare the subfloor to ensure it’s free of gaps and bulges and is perfectly level.
You can use a pre-mixed level compound to fill any low spots, but for any deeper dips in the subfloor, you’ll need to repair the subfloor.
Use a trowel to spread the compound over any gaps and seams in the subfloor until the subfloor is level.
You also need to take the type of floor into account and adapt your preparation method accordingly. For instance:
· For concrete floors, ensure the surface is dry, clean, and smooth, and repair any gaps. You can lower any high spots with a grinder. Minor bumps can be removed with a masonry chisel and a hammer.
· For linoleum or existing vinyl flooring, you can lay your new vinyl sheet flooring directly on top of the existing flooring if it’s in good condition. If there are indentations or there’s a rough texture, you can apply a coat of embossing leveler using a straight-edged trowel.
· For uneven or buckled flooring, which could be hardwood flooring or another type of flooring, you need to put down an underlayment before you begin installing your vinyl sheet flooring. That’s to ensure no bumps or dips of the old floor show through your new flooring.
Cut the Vinyl Sheet Flooring to Fit the Room
Before you stick the vinyl sheet flooring to the subfloor, you need to cut it to ensure it fits.
There are two options for doing that.
You could measure the entire floor area and then cut the vinyl three inches wider than the area of the floor. You would then lay it in place and trim the excess.
The other option involves making a template of the floor layout and using the template to cut the vinyl flooring to size.
Apply the Adhesive
Once you have cut the vinyl sheet flooring to size, it’s time to add adhesive.
Some vinyl sheet flooring will come with adhesive on the underside, but you’ll usually need to buy the proper adhesive for your type of subfloor.
Apply the adhesive to the entire surface area using a notched trowel.
Make sure you always follow the manufacturer’s instructions when applying the adhesive. That includes leaving the adhesive to sit for the required amount of time so that it can bond well.
Lay the Vinyl Sheet Flooring
The next stage is to lay your new vinyl sheet flooring.
Make sure you press it down firmly as you fit it into position.
Once you have put all of the vinyl flooring in place, use a floor roller over the entire surface to ensure the vinyl sheeting is pressed down firmly and sticks to the adhesive.
If there are any seams, you can use a seam sealer, remembering to follow the manufacturer’s instructions.
Make sure you keep foot traffic in the space to a minimum for twenty-four hours after installing the flooring, as it will take time for the vinyl sheets to bond with the adhesive and for the adhesive to dry.
Attach the Molding
If you remove molding during the preparation stage, the last thing you need to do is put it back in place.
When you install the molding, leave a slight gap between the molding and the flooring because the vinyl sheet flooring can expand slightly after it has been laid, due to humidity.
Because of that, you should nail the molding to the wall instead of the floor.
Hey, presto! Once you have followed the above steps, you’ll have a brand-new floor that will last for years to come.


Comments