
Your craft space is your creative sanctuary where you bring ideas to life. But if you’re sewing, painting gardening, or quilting on a daily basis, you’ve noticed how challenging it is to keep everything 100% organized. It’s often tempting to not store supplies back where they actually belong. When you’re an avid crafter, you’re using dozens of different tools. Some sort of organization system is then not only convenient, but highly recommended.
If you’re like me, your craft room shouldn’t just be ‘functional’ (meh.. boring!) but also.. aesthetic! After all, you’re spending many hours there creating. And what’s better for inspiration than a well-thought out & colorful craft environment? Here are 5 original craft room organization ideas that you can implement today.
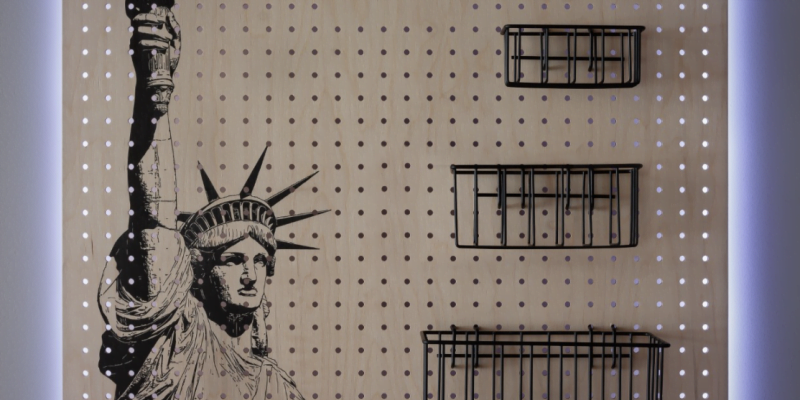
1. Create an awesome pegboard that’s the center of your craft room.
If you’re a crafter, there’s about a 90% chance that you already have a pegboard in your craft room. If you’re part of the other 10%, it’s seriously time to consider this timeless storage solution. Pegboard allows you to have a quick overview of the tools at hand and allows you to grab any tool fast and easily. Besides that, it comes at a very economical price point and makes your creative space look just that tad more ‘badass’.
Pegboard shouldn’t be plain white or brown though. Did you know it’s super possible to paint a pegboard and personalize it to the max? PegBoarder has an extensive guide on how to paint and decorate a pegboard that I recommend reading before picking up a paint brush.
If you really want to take your pegboard organization to the next level, you can span an LED light around the perimeter of the pegboard. Just check out mine below.
2. Use clear glass jars for colorful supplies
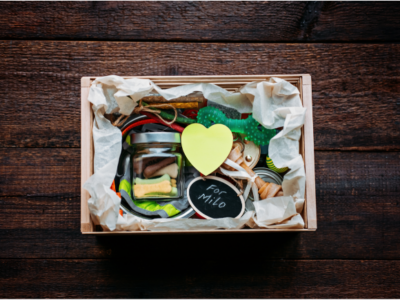
Lots of craft and sewing supplies are cute little colorful things. Think about binder clips, paperclips, thread cones, etc that you can keep along near plants on the plant shelf. What a shame to lock ‘em away. Find a prominent place for them, showcased in glass jars. Use empty peanut butter or jars and you won’t even have to order any! If you like things to be a bit ‘different’, you can even use different types of jars.
Personally, I love glass jars with bamboo & cork lids.
3. Use the inside of a cupboard
When your cupboard is closed, there’s usually a few inches of space in between the cupboard door and the actual content of your cupboard. If you play it smart, you can repurpose that lost space. Your wrapping paper rolls are taking up a lot of space? Stack ‘em on the inside of the cupboard door!
Another idea is to use an adhesive strip and stick cork to the inside of the cupboard door. Then, you can use the inside of that door as a board to pin documents such as calendars, goal sheets, reminders or coupons..
I like the idea of corkboard, but it always ends up looking so messy. Decluttering your workspace actually improves your productivity. Having the corkboard on the inside of your cupboard door kills two birds with one stone.
4. Throw things away that you’re not really using.
I hate sounding like captain obvious, but this is really one of the most effective and easiest things you can do to level-up your craft room organization. Go through each of your supplies and ask yourself, ‘Have I used this object in the past 4 weeks?’. If the answer is no, then you’re probably best off throwing the damn thing away or putting it on ebay.
If you’re throwing out a lot of stuff, it might even be a good opportunity to organize a garage sale!
Most of us have a hoarder’s mentality. Breaking free from this can be a mental challenge, but it will make it so much easier to declutter your craft room, and simultaneously, your mind.
5. Use labels
In this day and age of political correctness, we’re often being told not to use labels. I usually agree with that, but not in the craft room!
It might just be me, but I always tend to lose my supplies. Don’t get me wrong, I do actually store them after using them, but I just can’t remember where! I have over 10 storage containers, 2 cupboards with over 4 drawers each and 3 big shelves. How in the world can I remember where I put each and every single item?
I bought some item labels from Amazon, and honestly, they’ve reduced my stress-levels. I make sure to store all items that belong to the same category in the same container or shelf. Each storage unit then gets a label with the category name. I have for example, a label for each of these categories:
- Scissors
- Ribbons
- Pencils & Markers
So to conclude, there are 5 methods I use to organize my craft space:
- Using a custom designed pegboard for quick and easy access
- Using clear storage jars for colorful supplies
- Repurposing the inside of a cupboard door
- Routinely throwing things away
- Labeling storage containers and drawers


Comments