
The Automatic Chicken Door is one of the best gadgets right now for those people who pet chickens. Without the help of a chicken door, the users have to manually open the gates to let the chicken out.
There are various Automatic Chicken Coop Door openers available in the market but they are a bit expensive. So, most people come up with different DIY chicken coop door ideas which are less expensive when compared to Automatic Chicken Coop Door.
In this guide, we will discuss how to build your own DIY Chicken Coop Door opener. We have discussed a detailed and step-by-step guide which you can use to create the Door.
Things to Gather
Parts:
- Electric Car Antenna
- Timer
- A Power Supply
- Wires
- Terminal Strip
- Screws
- Aluminum C Channel
- Switch
- Solar Panel
- Solar Regulator
Tools:
- Bench Saw
- Hot Glue and Super Glue
- Soldering Iron
- Drill
Step by Step Guide for Building an Automatic Chicken Coop Door
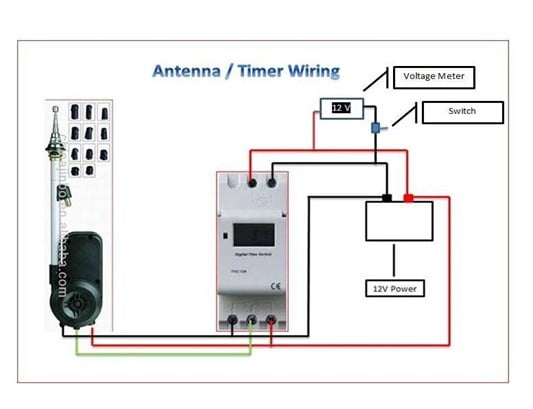
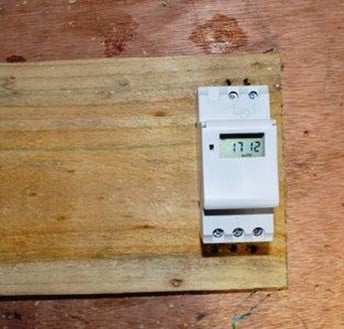
Step 1: Firstly, you have to test the Antenna and timer and make sure that everything works perfectly. You can either use a 12V battery or any power source that has constant power to check the antenna. If everything works correctly, then the timer available on the antenna starts to retract.
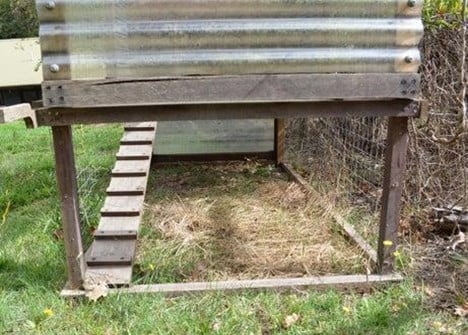
Step 2: Then, you have to plan the structure of the door. There are many different types of coops available and you have to be careful while placing the door. Once you have decided where to place the door, then you have to design the working of the door.
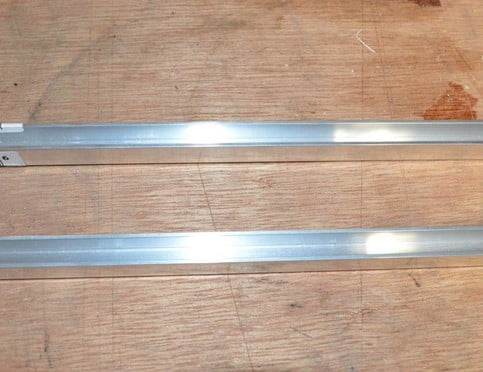
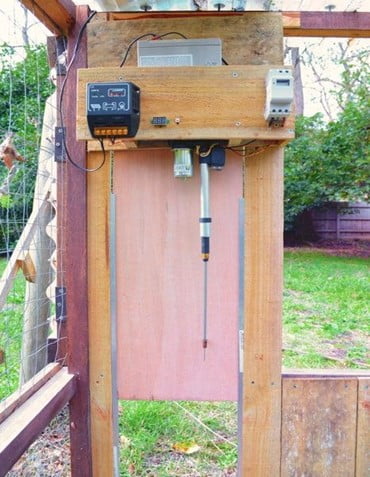
Step 3: Now, you have to create a C Channel for your door, it will help in keeping the door in the right position. For this, you have to cut two equal lengths of wood and attach your C Channel into it using screws. You have to make sure that the wood is as straight as possible. Now, attach the C Channel to the Coop and make sure that while attaching the C Channel, the distance must be the same from top to bottom, otherwise, it will jam.
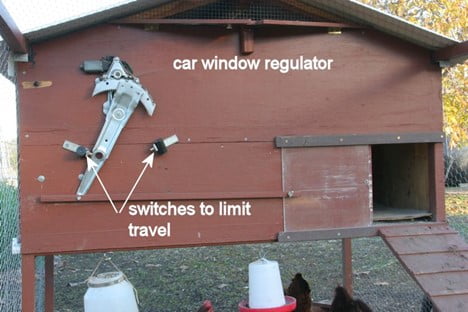
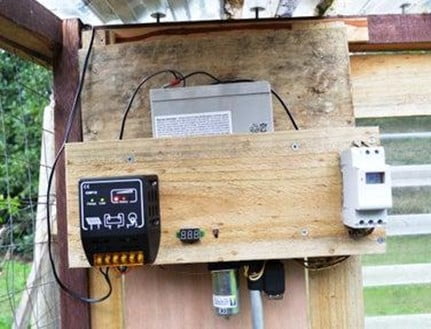
Step 4: Now, you have to mount the Antenna. For that, you will have to attach a wooden bracket to another piece of wood. Finalize, where you want to place the antenna and then fix it using screws and tape. Now, bolt the antenna perfectly into the place. Use the drill to take out extra holes for wiring, so that the setup looks clean.
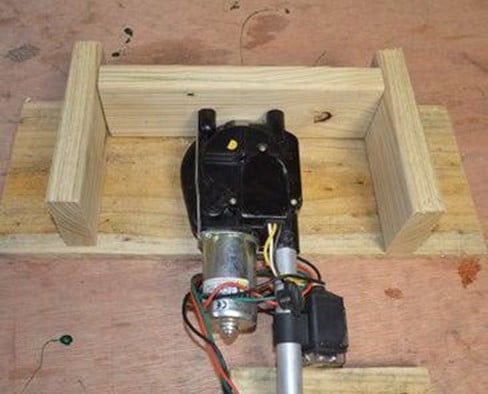
Step 5: Now, it’s come to attaching the wires. You will need a piece of wood, the same size as the one you have mounted the antenna to. Attach the timer into it and drill two holes on the top where you have attached the timer for passing the wires. Finally, attach the board to the wooden antenna bracket. Now, attach all the remaining wires from the antenna to the timer.
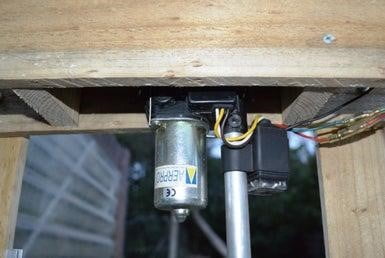
Step 6: After attaching all the wires, the time has come to attach the antenna to the coop. You have to use bolts and nuts to mount the antenna to the coop. Then, if you find the antenna too long, cut it according to your own length. You have to be very careful while doing this because any mistake will lead to destroying the antenna.
Step 7: Now, you have to make the door, for that, you have to measure the distance between C Channels and the height from the ground to whatever length you want to build the door. Now, cut a piece of plywood that fits the gap perfectly and slip the door between these C Channels and make sure that it moves smoothly from up and down.
Step 8: Now, you have to attach the door to the antenna and for that, you need to drill a hole in the bolt and thread it to the antenna. you have to make sure that the bolt always remains in its place and for that, you can use some drill collars. It helps to keep the bolt in place.
Step 9: Finally attach the solar panel and voltage meter to your door setup. The solar panel is very helpful in providing a stable power supply when the battery goes dead. You can also use the solar panel to keep the battery always charged.
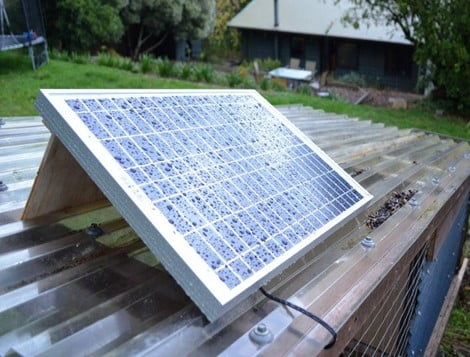
To attach the solar panel, firstly you have to attach the solar regulator on the wall of the chicken coop and make sure that you place it close to the antenna and battery. Connect the wires from the panel to the regulator and do the same for the battery to the regulator.
Step 10: Now, the final step, test all the equipment and make sure everything is working correctly. It is recommended to keep the timer on auto while using it, it will help in setting the time to open and close the gate. You should also check the voltage level of the battery regularly.
Now, you have your own DIY Automatic Chicken Coop Door. There are different options available in the market if you want a prebuilt door opener. We have also made a complete guide on Some of the Best Automatic Chicken Coop Door Openers. You can check that article and buy any one of them which comes into your budget.
Final Words
So, creating your own DIY Automatic Chicken Coop Door Opener is not a tough task, you just have to keep patience while creating this. All the materials required while creating this door can be easily bought from any hardware store or available online.
You have to be very careful while attaching the door and make sure that there is no jamming between the doors, otherwise, it will impact opening and closing the door.
This is all about this guide, we hope you find it helpful. I also want to say thanks for looking into the article and I hope that this has inspired you to create your own Automatic Chicken Coop Door Opener.


Comments