
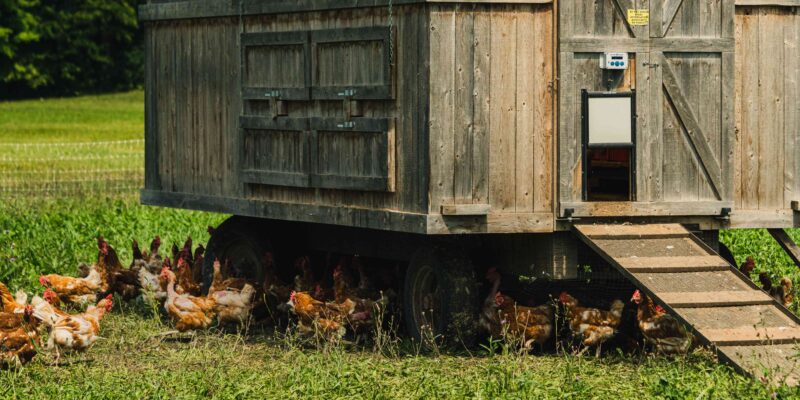
An automatic chicken coop door can be handy for maintaining chickens and handling big ones.
This is probably the most desired item of chicken keepers. Thus, keeping chickens safe and healthy is the most important thing for a poultry farmer.
However, many brands are experts in automatic chicken coop doors. The tricky part is installing them.
You don’t have to worry; we have provided all the details regarding installing this automatic chicken coop door.
You can also begin by reading the manual included with the machine, as different brands can have slight differences.
Rest up all the details below, and you will be ready. Tune in to learn the steps to install an automatic chicken coop door.
Materials Required for Chicken Coop Door
Before you begin the installation process, you need to ensure you have all the necessary supplies on hand. Thus, we have mentioned below a list of supplies that you would need.
- Automatic Chicken Coop Door Kit: Purchase a kit that includes the door, motor, timer, and any necessary mounting hardware.
- Screws and Bolts: Different types and sizes may be needed depending on your coop structure.
- Power Drill: For making holes and driving screws.
- Screwdriver: To secure screws and bolts.
- Measuring Tape: This is used for accurate measurements during installation.
- Pencil or Marker: To mark holes and cut lines.
Steps to Follow to Install Automatic Coop Door
This process can be tricky, so we have mentioned all the necessary and basic steps for installing this automatic door.
Make sure you follow all the steps and work according to them.
1. Choose the Installation Location
This is basic, as you need to select a suitable location to install your automatic coop door.
This is necessary because you need to see where you can easily access it to program and maintain it efficiently.
Also, ensure the door has enough clearance to open and close without hustling. This will help the chicken have motion easily.
2. Measure and Mark the Door Placement
After you have selected the location, you have to measure so that you can place the door.
Measure and mark the desired height for your automatic chicken coop door.
Generally, installing the door about 6-8 inches above the ground is recommended to allow easy access for your chickens and prevent pests from entering.
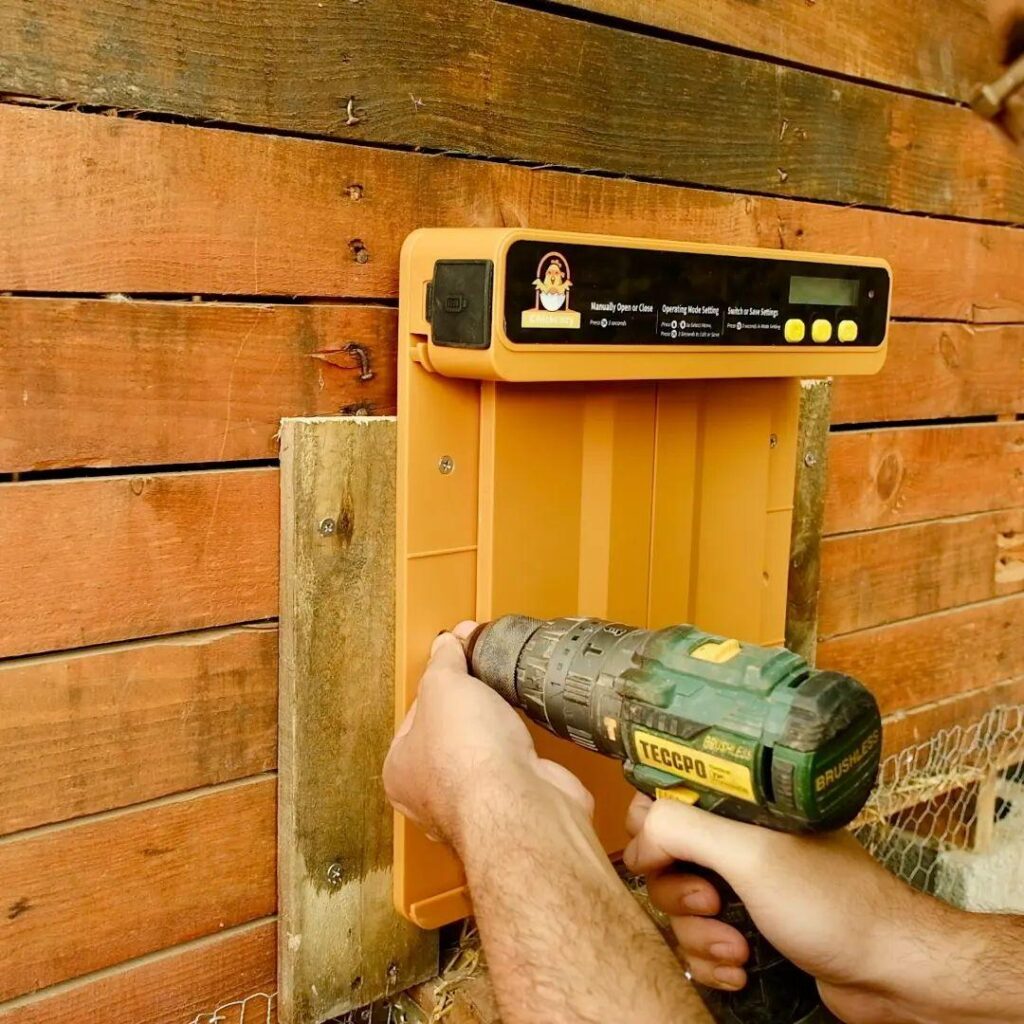
3. Install the Motor and Pulley
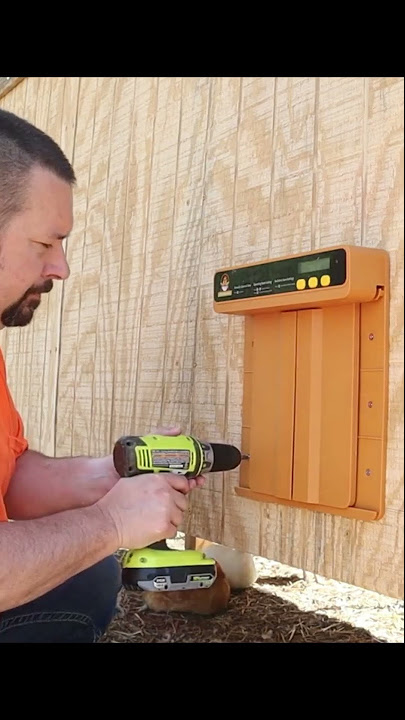
As we mentioned before, reading your manufacturer’s instructions is necessary to make it easy for you to install.
Follow the manufacturer’s instructions to install the motor and pulley system according to the measurements and marks made in the previous step.
Securely mount the motor and pulley to the coop structure using appropriate screws and bolts.
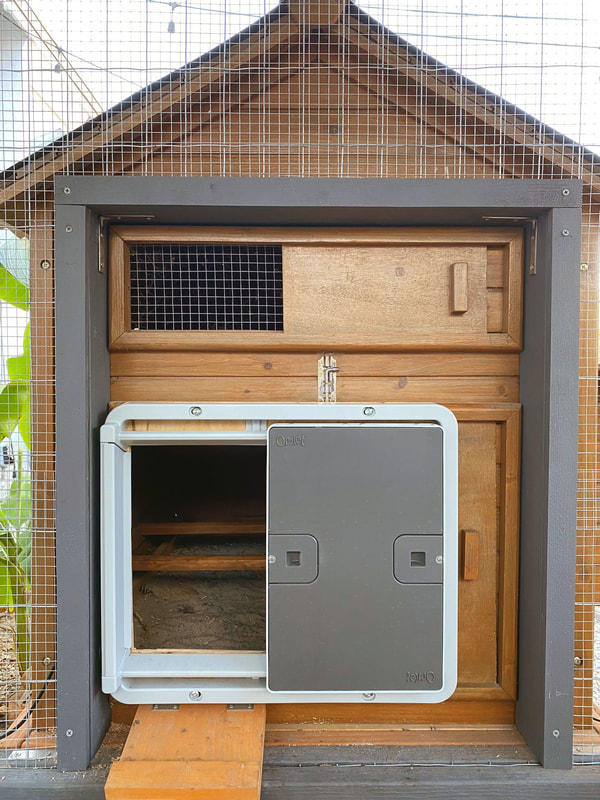
4. Install the Coop Door
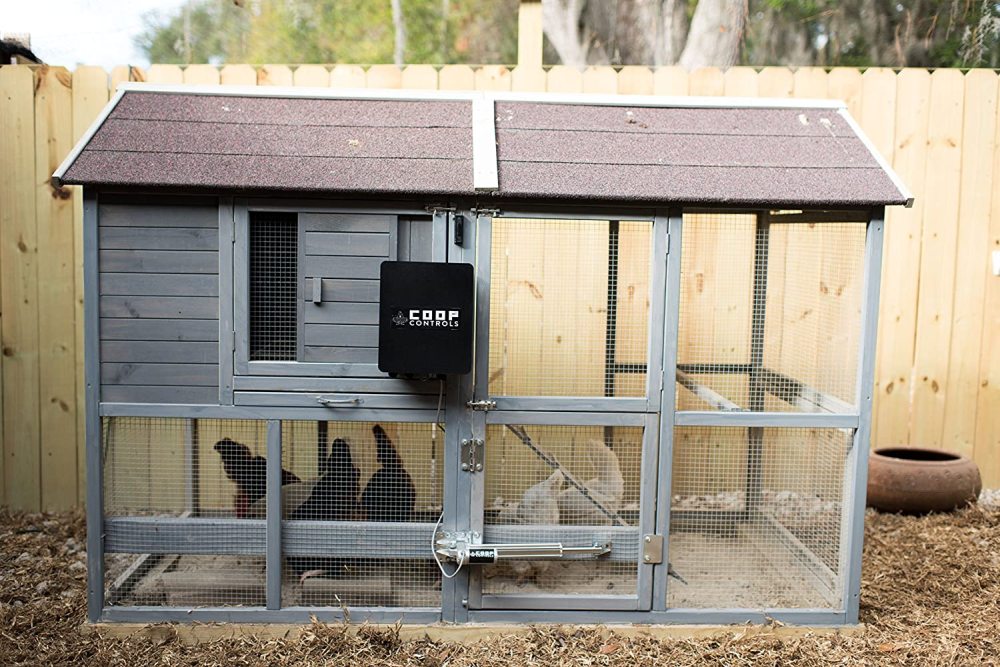
Attach the coop door to the pulley system. Ensure the door moves smoothly up and down when the motor operates it.
Make any necessary adjustments to ensure proper alignment and movement.
This is necessary as it will allow the door to be moved appropriately.
5. Connect to The Power
Connect the automatic chicken coop door motor to a power source according to the manufacturer’s instructions.
Typically, this involves connecting the motor to a battery or power adapter.
Make sure the power source is securely mounted and protected from the elements.
6. Set the Timer
You can program the timer to open the coop door in the morning and close it in the evening, according to your chickens’ needs.
Refer to the timer’s user manual for specific instructions on setting the desired times.
7. Test the System
Test the automatic chicken coop door to ensure it opens and closes smoothly at the programmed times.
If necessary, adjust the timer or door alignment.
8. Monitor and Maintain
Regularly monitor the automatic coop door to ensure it continues to operate correctly.
Clean and lubricate the moving parts as needed to maintain smooth functionality.
Check the battery or power source to ensure it’s providing adequate power.
Conclusion
By following these detailed steps and ensuring you choose the correct dimensions for your automatic chicken coop door, you can enjoy the convenience and peace of mind that comes with a secure and functional chicken coop.
This automated feature saves time and helps protect your chickens from potential threats, making it a wise investment for any poultry farmer.
These automatic coop doors ensure the safety of your chickens, allowing you to enjoy the convenience and peace of mind that they bring.
This machine is worth the money and not very difficult to install.
Frequently Asked Questions
Can I Install Multiple Automatic Doors for Different Sections of The Coop?
You can install multiple automatic doors if your coop has separate sections.
Ensure each door is appropriately sized for the section it covers and program the timers accordingly to meet each section’s specific needs.
What Safety Precautions Should I Take During Installation?
Wear appropriate protective gear, such as gloves and safety glasses, and prioritize safety.
Use caution when handling tools and working with electrical components.
Can I Adjust the Opening and Closing Times of The Automatic Door?
Yes, most automatic coop doors come with programmable timers.
You can easily adjust the opening and closing times to suit your chickens’ routine.


Comments