
In this pandemic, we all had picked up various activities and hobbies that we have either never tried before or had forgotten about because of the usual hustle of life. One of these activities that have been picked up is gardening and home décor.
The calming nature of gardening and the feel of soil on our hands could temporarily make us forget everything that was going wrong in our worlds. Another benefit of gardening is that it beautifies the surroundings and is also very good for the environment.
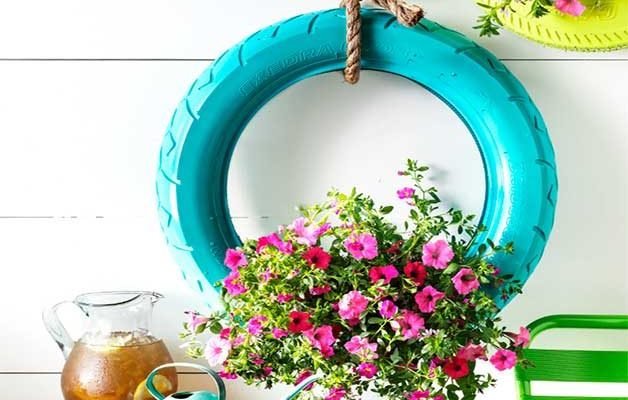
Gardening is involved with plants and helps reuse many articles of our daily lives, which would otherwise end up in an environment degrading landfill. One such article is an old tire. We can use a tire as a hanging tire planter.
For everyone who wants to add style to their garden or improve their home décor, a hanging tire plant is easy to make and is very affordable.
Make a Hanging Tire Planter – Step by Step Guide
The first thing to do is to make sure that you have all the necessary items you need and collect them together. Those items are:
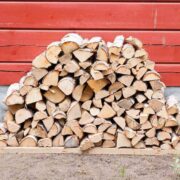
Tire- An old and used tire is preferable as we want to be reusing the waste. An important thing to remember while choosing a tire is that it can support the plant’s weight and all the wet soil, so the tire should not be very flimsy and broken. Finding old tires is very easy. If one does not have an old tire of their own, they can go to local dumps or automobile shops to buy or get an old tire.
Tire Cleaner- As tires are exposed to everything on the road, like dirt and oils, it is imperative to clean the tire properly before working on it. The tire will be painted over. It is better if the tire is cleaned to one’s best abilities, preventing the particles from clumping together during the hanging tire planter’s painting process.
Chalk- Chalk is necessary to mark and draw on the tire before directly working on it. It will allow mistakes to occur before the final process.
Box cutter- A sharp box cutter or any other instrument like a Sawzall can cut the tire neatly and efficiently.
Hook- A hook is an essential item to make the hanging tire planter as the tire will be placed on the hook. The hook needs to be sturdy and durable. A hanging hook with at least a 75lb test limit will work correctly.
It was planting Soil- A soil that is compatible with the plant that will be grown.
Plants that can grow onto, hang, or drape against the hanging tire planter and are of different heights and colors are necessary and popular.
Protection gear- While making the planter, there will be cutters, and to prevent getting injured, it is good to have proper protection for your hands and eyes. It will also prevent soil from collecting in one hand nails.
Paints- For painting the tires to beautify the décor. Spray paints are an excellent medium to use for painting the tire
Steps to make Hanging Tire Planter
Step 1-Before making the hanging tire planter, the tire must be washed and cleaned properly. Spray the tire with a good tire cleaner and scrub with warm and soapy water. While washing it, there might be black residue collecting on your hand. Make sure you rinse off all the residue to be able to clean the tire. For the best results, wash the tire, then let it dry and rewash it.
Step 2-Using the chalk, mark a line along the outer circumference of half the tire and a line along its half-line only on one side of the tire. This is necessary to give space for the plants and reducing a bit of weight from the tire.
This cut is necessary. If wanted, a similar line can be made along the other side to give it a basket shape to the hanging tire planter. Different designs on the tire can be cut out to add a more artistic look to it.
An example is making a small triangle on to the top half of the tire’s front side and cutting only partially. This will add a highlighted look on the tire. The chalk lines can be dusted off, so if there is any mistake, all you must do is try again!
The example:

Step 3- After the drawing, the line using the box cutter slice off the lined part. Keep your hand steady and slowly make your way through the semi-circle. To be safe from any injury, protect your hands by wearing appropriate protective gear.
Step 4-Choose paint color and arm yourself with paint brushed or the spray can. Make sure you cover the whole area of the tire adequately and apply a smooth layer. Painting is not compulsory, so it is entirely upon you.
One can design the tires by adding patterns or other artistic touches to the sober tire. An example is polka dots; it gives a style to the tire and gives character to the area.
Step 5-Purchase the needed hardware to fix the hook in the desired location. Drill in a hole and place the sturdy hook at a high enough position. After placing the hook and securing it, place the dried tire and make sure the hook can hold the weight.
If you place the hook on a wall, you might notice that the tire could be slightly unbalanced and tilted forward. If this is the situation, drill a hole, of the hook’s width, into the tire and then insert it onto the hook. Now the tire will be flat against the wall.
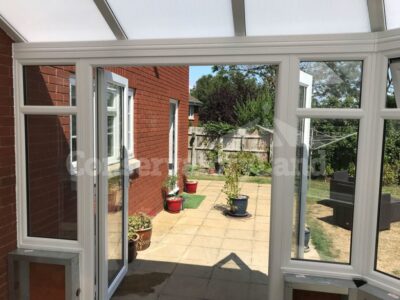
If you have a high ceiling, instead of a hook on the wall, you can also suspend the tire from a ceiling hook with the help of a strong rope or chain. Then it will look like this-
Step 6-This is an optional step, but if you do not want excess water to collect below the soil and preventing enough oxygen flow to the plants, make small drainage holes along the bottom of the tire.
This will pass all the excess water out of the hanging tire planter. It is advisable not to do this step if you are in a dry place as the water evaporates faster in those regions. So, it applies to indoor gardens as this will make the area very damp.
Step 7-From the area cut off the tire, start putting in the planting soil. The cut area provides easy access to the bottom of the tire and makes the work better. It will also give the plant space to grow.
After putting in enough soil, start arranging the chosen plants by planting them into the pit. Keep an eye on the formation and the type of plant when choosing its location in the soil.
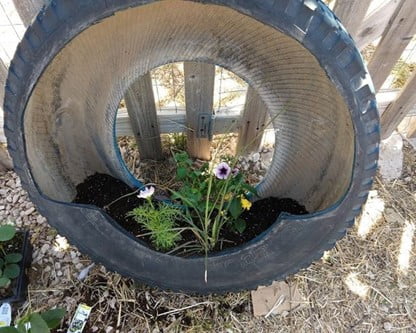
A plant that will hand downward should be in the front to grow neatly, while a plant that usually curls onto surfaces should be on the ends of the arrangement to get support from the tire. Various heights and colored plants enhance the beauty of the hanging tire planter.
Step 8- After all the planting is done, secure the soil with a wet hand but not too much water and then hang the tire on the hook. Though the weight would have increased from the time you hung it on the hook to the earlier time, it will still sit on the hook comfortably as the soil and plants would not have added too much weight. Be careful while hanging it as you don’t want all the soil and hard work to fall off. Take help from someone else to make sure it is adequately lifted.
Step 9- In the earlier step, it is essential to not water the soil entirely, but after the hanging off the planter is completed, water the soil and enjoy your new hanging tire planter!
The hanging tire planter does not spoil for many years as tires are extended-lasting and off heavy duty. It will not only give your garden a nice look but will need the bare minimum to maintain. Regularly water the plants and watch the plants grow onto the tire.


Comments