
Outdoor storage sheds are very important if you are leaving with your family. There are lots of tools and other things, which cannot be stored inside the house.
For example, garden tools, pipes, detachable pools, etc. To store such things outdoor storage sheds are a must.
There are lots of methods to build a storage shed for your house. You do not have to spend lots of money to build such a house.
There are lots of DIY ideas and the best part is you can build a shed on your own. But the question arrives where to find such ideas and what is the material required.
Well let us tell you, you have found the appropriate platform to find the ideas of building a storage shed. We are going t tell you the whole procedure stepwise with images for better clearance.
Since there are many DIY ideas, but wood storage shed is best. It is cheap, easy to build, and durable also. If you paint the walls, rain is also not going to affect them.
Let’s start the procedure!
Material Required
- Lots of wood. Make sure you take the equal plane wood sheets. You may also need plywood and rafters.
- Screwdriver of different shapes and machines also.
- Hammer and some nails.
- Paint according to your preference.
Step 1 – Get a Permit First
Depending upon the locality in which you are living, a permit may be required. It is not necessary for all the places but make sure you get the proper information first.
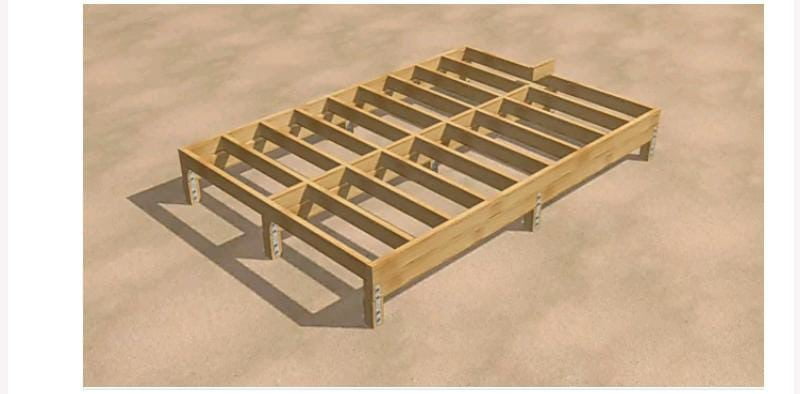
Step 2 – Clear the Base
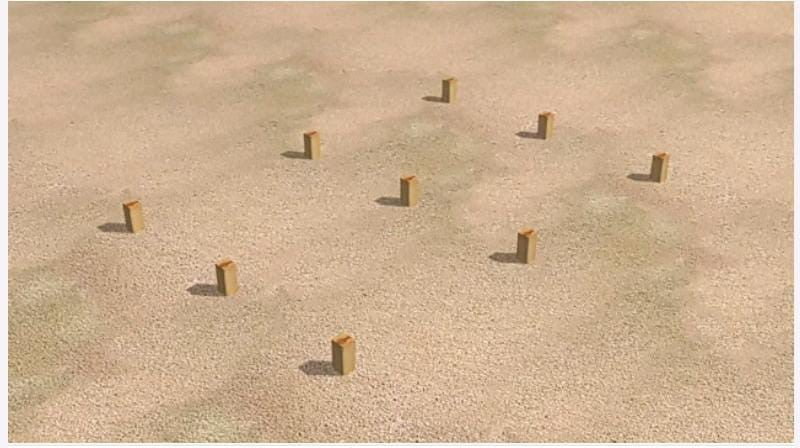
If necessary make the base surface plane. Make sure there are no stones and other stuff left in the ground. It may cause trouble. Once your plane the surface adds deck piers to the ground. It will add extra support to the shed. Make sure the wood used to make piers is strong enough to handle the weight of the shed.
In the image, the piers are placed at a distance of 12.8 feet. If you want to make a concrete base, install it first then go for the second step. A concrete base can save the shed from water.
Step 3 – Add Wooden Support Beams to The Deck Piers
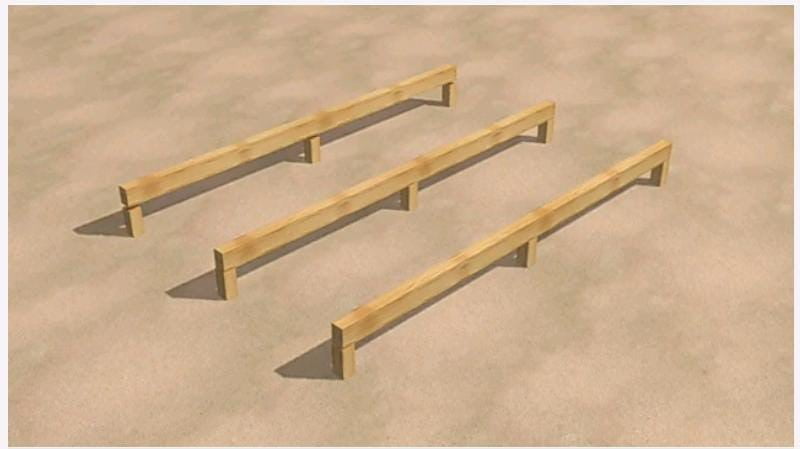
Cut the wood pieces into appropriate pieces to use as support beams. If you have places 4 decks in a horizontal line, place 4 decks in vertical lines. Make sure you take the measurement first.
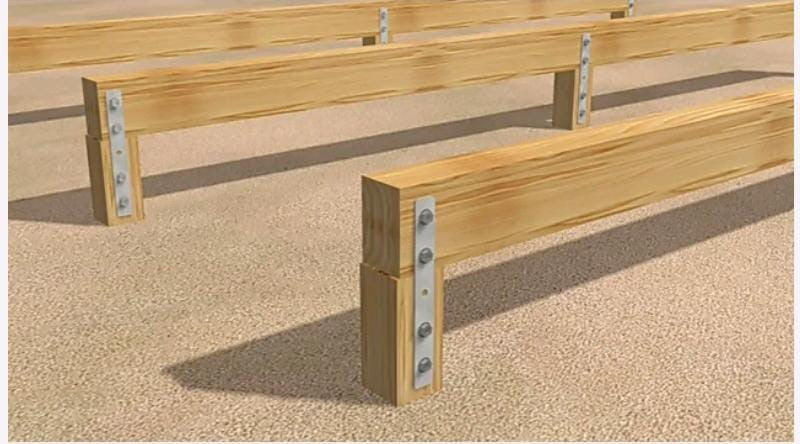
Do not forget to secure it with metal straps and add a screw to make it tighter. If you don’t have the metal strap available, you can go for simple nails. But this requires a lot more effort than using a metal strap.
Step 4 – Attach One More Layer of The Joist to Support the Beam
Add one more piece of the wooden joist to support the beam. Take the joist of the exactly same length as the beams.
Next, you need to install the floor joist to build a strong floor. Take the joist of the same length as the distance between the two rims. If you do not want the joist to move from their place, add another layer of the joist in between the previous one. It will secure your base properly.
Step 5 – Add Plywood Sheets
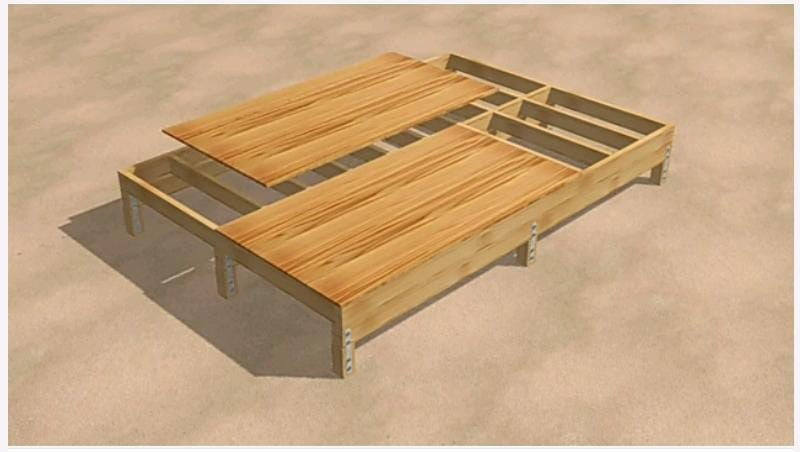
Take long sheets of plywood as per the size of the joist. You can take two to three pieces as per your choice. One piece can also work. Now secure the plywood with tons of nails and a hammer. Secure the nails properly to avoid any misalignment.
Step 6 – Time to Build the Framework for Walls
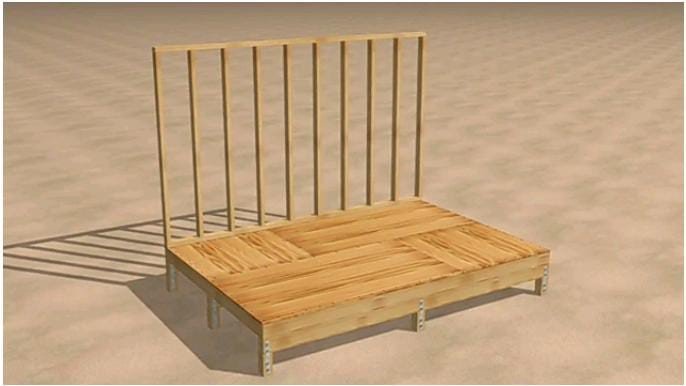
Make the framework as shown in the picture. The wooden framework is different for the front and back sides. You have to make a slope with both the walls therefore, keep one wall shorter than the other. Left the space for the door at the wall with a shorter length.
Build the framework for all four walls and then, finally for the roof. It will be easy if you build the front side first, then back, and lastly the remaining two sides. If you follow the same pattern, you will understand the whole physics easily.
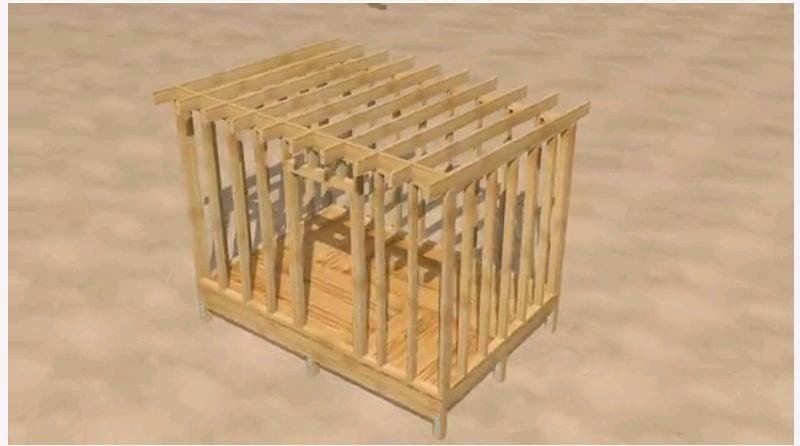
Step 7 – Fill the Roof with Wooden Rafters
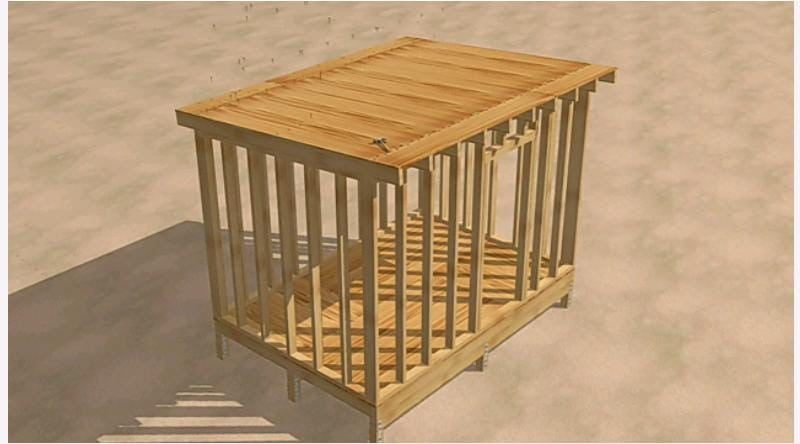
Build 2-3 rafters for the roof and apply the block pattern. Space them in the same way, you spaced the floor of the shed. With the help of a hammer and nail secure the rafter. Secure it will, otherwise it may fly away by a thunderstorm and heavy wind.
Step 8 – Add Wooden Plywood to Cover the Walls
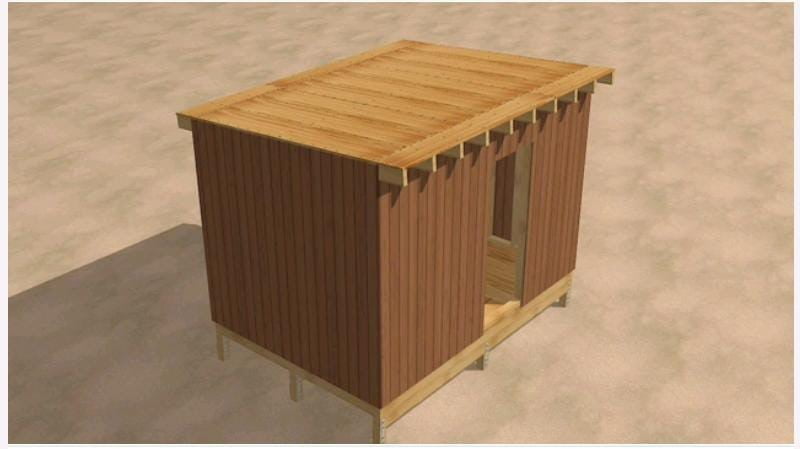
The second step is to make plywood rafters to cover the walls. Take the measurement properly and build the plywood accordingly. Don’t forget to secure the plywood with lots of nails. Use the nails wisely as the sharp ends may hurt anyone latterly. Therefore, cover the exposed sharp ends of nails with plastic material to avoid any future injury.
Step 9 – Paint Your Shed
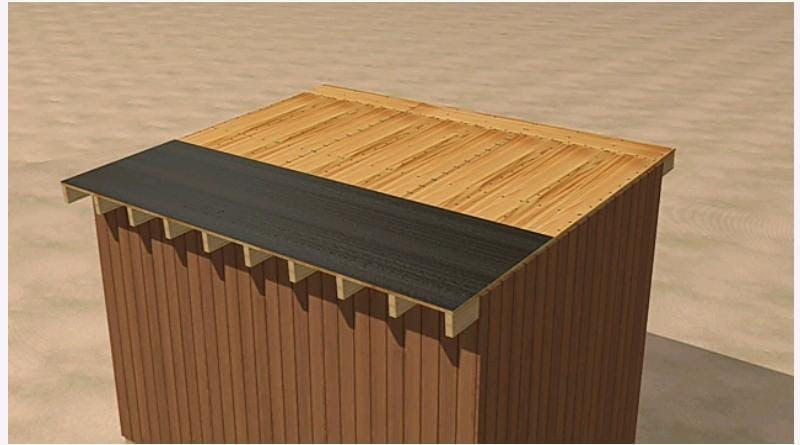
The last step is painting your shed beautifully. If you don’t want t paint it, simply cover the roof with tar paper. It prevents the rain to enter from the cracks of rafters. Add the same paper to your walls if you live in an area with heavy rain.
If you want, you can also add a door to your shed. But this is not the necessary step. You can leave it like this.
But if you are scared that someone will make it into your shed then definitely add a door. You can either build a door by yourself and add it with the help of screws or order one from the local carpenter.
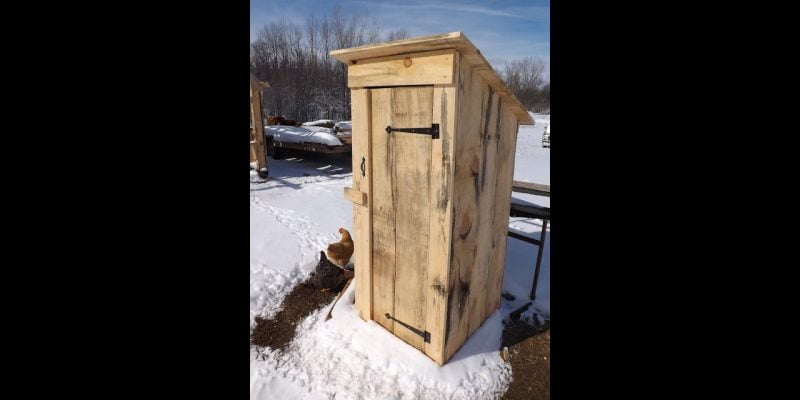
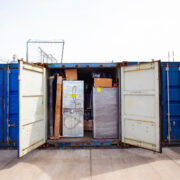
These are the nine simple steps to build an outdoor shed for storing useful tools. It can be used as an outhouse for wheelbarrow storage, tools storage, cycle storage, etc. You can take a brief idea with the help of inserted photos.
If you know little about wooden work, you are going to build an excellent storage shed. Do not stop or give up until you end up building a storage shed.


Comments