
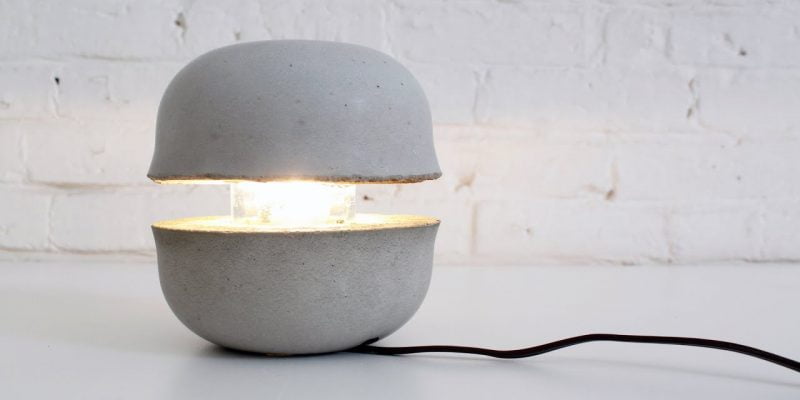
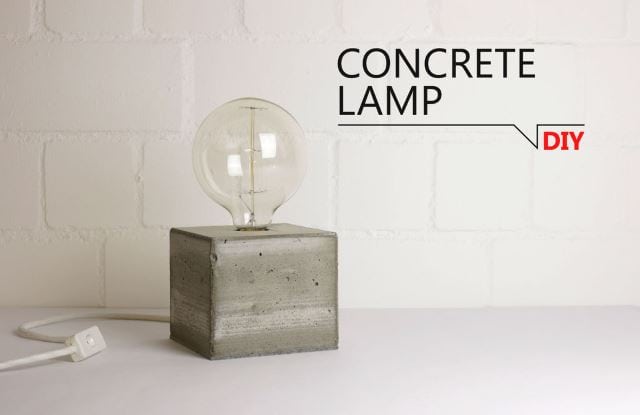
Today, small lamps are a great source of attraction. Either you put it in your room or dining table or anywhere in the house.
People purchase them, especially for beauty, add on to their house or a particular room, and they also serve for little vision at night.
What if you make one on your own? This will be a fantastic and unique experience ever for you to hear compliments from people.
Moreover, they also want to learn this skill from you. Is it easy to make DIY Concrete Lamps at home? The answer is a big YES. All you need to know that how to make your Concrete Lamps is here.
This read will help you make the best use of your hidden skills and create something exciting.
Before making your own DIY Concrete Lamp, let us look at the things you need to make this.
Things You Require
A light cord, lamp holder, Portland cement, gypsum, limestone, a lamp bulb of your choice as per the wattage, small screws, etc.
[amazon box=”B01LFYVW7O, B002KL5VRO, B06X6DY3K7, B06VTPPGDH, B076CN463G”]How to Prepare Concrete Mix?
To make the concrete mixture for your lamp base, you need to take Portland cement first, mix small, crushed stones to make it harder.
You need to add limestone to make it the best hard material for your Concrete lamp’s strong base.
Gypsum is a perfect add-on that can help decrease the settling time of cement, and you may need less time to get the Concrete to come in the strength you need for your Lamp Base.
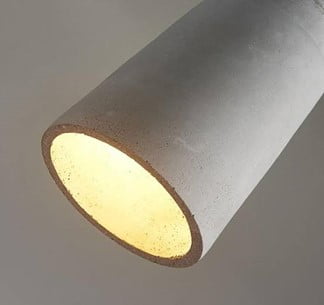
The cement is the main thing you need to take care of on the top of the list if you plan to make your lamp base, and you can imagine any shape and make it as per your choice.
Final finish to the base and add the texture you can use many techniques like using different colors and drawing something on the base to get it highlighted.
Plastic or Silicone Flexible Tubing

This is very important for the wires or cables you need to insert to get your lamp glowing. This tube should have an appropriate thickness, satisfactory quality, width, and length that matters a lot.
If the length is not appropriate, how will you insert the cable to connect your lamp with an outlet to turn it on? Width plays an integral part as to get the cables fitted and free to stay within the tube.
Quality of the tube is also essential to make the lamp durable and use it for a longer time. You can use Rubber pipe, Silicon pipe, Plastic Pipe and some people use Metal pipes. You can get one as per the choice you want and the money you want to spend on it.
The thickness of the pipe is also an essential aspect of taking care of if the highly tensile concrete structure will destroy the pipe while inserting them inside. It may be broken and pressurized by the rigid structure.
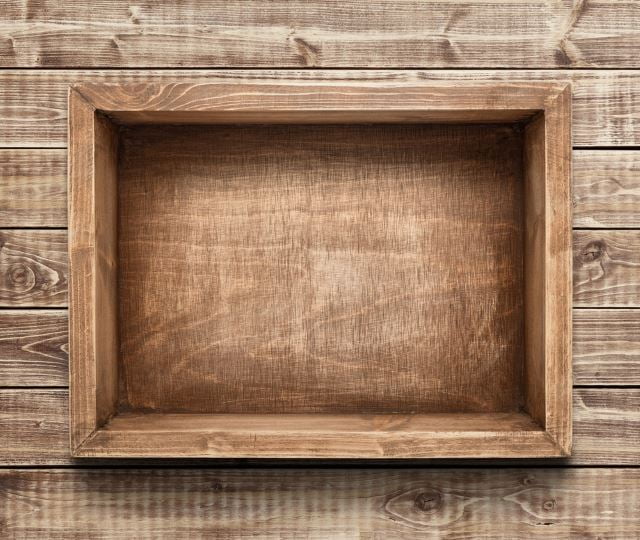
Mold for a Base Design
This is what you need to have to put the concrete mixture in it and get the design as per your choice.
Mold may be of any type like Carton, milk powder box, any potato chips can, etc., and it is dependent on the design or the structure you want.
You can cover the outer part of your Mold with Silicon or plastic or PVC sheet to not allow the Concrete’s water to flow out till it sets the Concrete to the strength you want.
Steps to Make Use of the Above Material for Your Concrete Lamp.
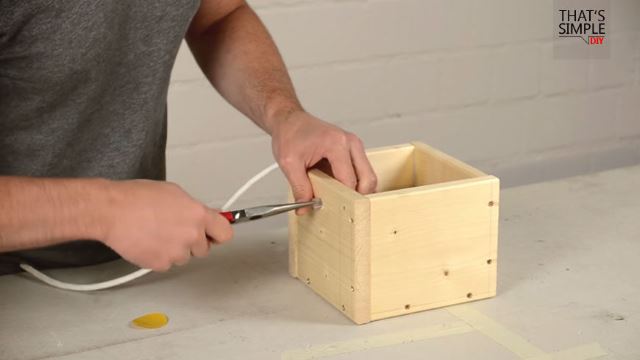
Step 1. Preparation of your Mold
To prepare your Mold, you can use old glass vases, big containers of peanut butter, potato chips cans, cartons carrying great products like biscuits, big containers carrying grocery, and many more.
You can make your Mold with some wooden base as well, as per your choice. Any container of different shapes will add to the beauty of your Mold or the base of your Concrete lamp.
You can put your concrete mixture in the container as you chose from the above available options. Seal it well till the whole Concrete settle down and become hard.
If you use a glass vase, you need to have a glass cutter to make a hole for the pipe you will use for the cables to insert in.
Step 2. Insert Tube and Seal the Openings
Before putting the Concrete in the container or the Mold, insert the tube you are using for the cable’s insertion.
If you use the PVC tube, it will be very helpful as they are hard and will give you the best quality tubes inside your Mold.
Make an angle so that the tube goes to the bottom of the lamp where you need to connect the cables for the lamp to lit up.
Now please seal the edges so that the water from the Concrete will not leak and check for any other hole or small pore, if any, that may lead to leakage of water from the concrete mixture from your Mold.
Step 3. Pouring in the Concrete Mixture
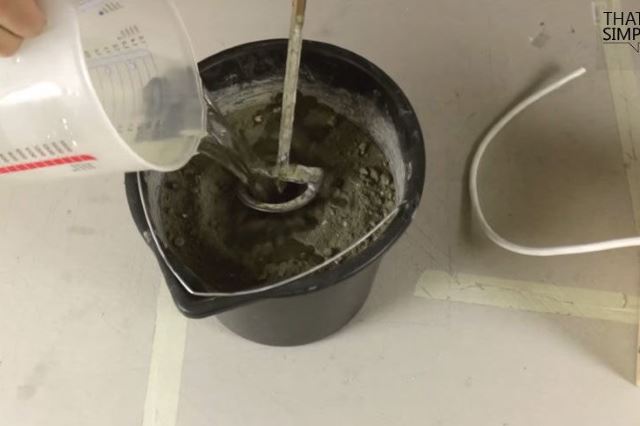
When you have prepared your concrete mixture, you can pour it into a container or Mold of your choice and shape.
While mixing Concrete, you need to add water slowly with constant mixing. Do not add water in one go and a lot.
Else it may lead to a liquid substance, and you need to add more cement or stable, which may lead to a large quantity.
The left one will be of no use at all for you. Excessive quantity will lead to an increase in wastage.
Once you are done with the concrete mixture, you can add the color of your choice to the mixture for the best add on to the beauty of your concrete lamp.
Step 4. Removal of Outer Covering
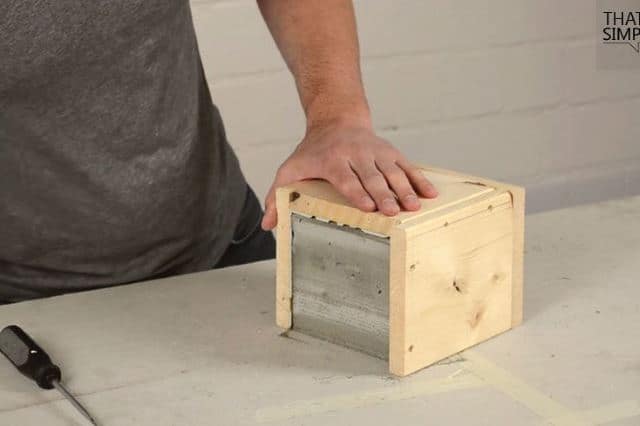
Now, it is time to remove the outer covering that is holding your base of the lamp. To remove it, you need to wait for about two days to get the Concrete to settle down to the solid hard and dry.
Once the concrete mixture binds together and gets the strength, you can remove the outer covering or the material of the container you use to design your lamp base.
If you have used a glass vase, break the glass with a hammer, making sure that it will not hit the concrete mixture. Else, it will damage the shape.
If you have used any wooden frame, peel it off, and you will be done. So, the method of removing the frame will depend on the material you use to make it.
Step 5. Finishing of Base and Inserting the Wires
Now your base is ready for the finishing and textures. Please pick up sandpaper, scratch the edges and the spots where you see any misbalance to make it smooth and straight.
You can remove small spots or loose Concrete that did not settle properly.
Spray painting is the best option nowadays to give a new look to your concrete lamp. To add on beauty, you can use different spray colors and make an abstract design as well.
After giving the complete and final touch to your base, you can insert the wires through the pipe you already inserted in.
Connect the wire to the circuit of the lamp holder. You are good to go to connect it to the outlet to check the beautiful homemade Concrete Lamp.
Step 6. Plugin the Bulb
Now you connect the bulb of your choice and wattage to get the light of any color you want. You have many colorful bulbs available in the market, so choose the one you like and spread the light with your self-made Concrete bulb’s beauty.
A white bulb with an abstract red base will look so cool and awesome. Blue light with grey and black abstract will be an excellent choice for you.
Final Pointers
You have the best lamp bulbs now and of your own choice, shape, and design. If you go anywhere to buy one, it may be boring after some time, but here, you can make your own with different designs and fill your life with beautiful lamps and of course with the brightness of the light of your choice.
If you read the above steps carefully, you can make any of your favorite design lamps and flourish your life more!


Comments