
The Rain Barrel is a rainwater-accumulation storage tank that will otherwise be lost. The rain barrel is a drum where it gathers the rainwater falling from the roof.
With restricted cost and content, you can make your DIY rain barrel quickly. The rainwater in the barrel can be collected and used for home chores.
This will save a lot of money, and you are going to drink water that is refined. This will mean the water will not be lost.
Advantage of Rain Barrel
You all might be aware of the water scarcity that the world is facing today. According to the reports, many developed cities will run out of groundwater by 2020.
The adversities of water scarcity are not unknown. It is essential to do our part to save as much water as possible.
Rain Barrel is the best and easiest way to save rainwater. Just storing the rainwater and using it for simple house chores can make a huge difference.
You can save more than 1300 Gallons of water even during the peak summer months.
Readymade or DIY Rain Barrels- Which is Better
Many people get confused as to which rain barrel is better. Though there are many rain barrels readily available in the market, they can be a little expensive.
[amazon box=”B00YFT9846″]Many profits are added before it has reached you; hence it can be a costly affair. Whereas making your DIY rain barrel will be easy on your pockets.
DIY projects are fun, and you can easily do it in your free time. You can quickly grab the few things needed, some free time, and you are good to go.
How Does Rain Barrel Work?
When it rains, the extra water flows through the roof or shed, and that water is just wasted. In the era of water scarcity, it is not an intelligent thing to do.
The simplest way to store the rainwater is a rain barrel. You will have to place the barrel below the shed or roof from where water comes down.
You can hook up the barrel or attach a downspout tube. The water will be easily collected into the barrel. Now each time it will rain, the water will be collected until you use it.
Easy Step by Step Guide to Make DIY Rain Barrel
The Downpour Barrel Tank is the most comfortable and most ideal approach to store water to spare the world from a shortage of water.
To save your money and excess water, you should assemble a DIY rain barrel. Here we have given the means to make the DIY rain barrel agreeable and straightforward with the least things.
To make the DIY rain barrel, you need a silicone caulk, adaptable downspout converter, washer, metal hose tucker, MHT/MIP/MP Metal Connector, Dark Iron 90-degree elbow, Plastic Barrel.
Drill the Hole
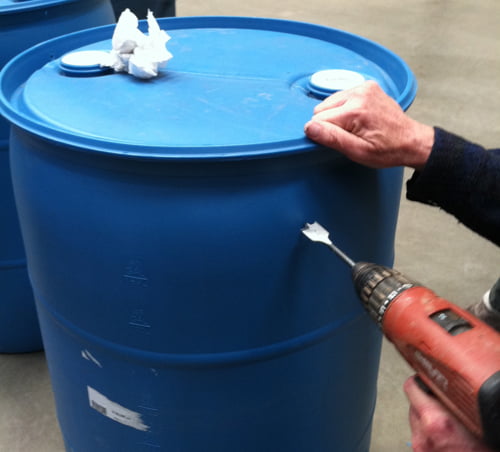
The very first step is to drill the hole in the plastic barrel. To dig the barrel hole over the curve using the drilling unit. Attach the connector of the downspout to the back of the barrel. Drill another hole from the bottom of the sidewall barrel for 4 inches now. Make sure to fit the plug of the barrel with it. The first hole is going to be for the spout.
Second Hole
Drill the hole at the top of the base bar now. Make aware that this gap is situated on the barrel’s front side. Remember that it should be at the back of the roof when digging the hole on top of the DIY rain barrel. The downspout will go straight into it when you position the water barrel outside your home.
Connect the Overflow Adapter
put the overflow adapter into the first opening and ensure that it is threaded as close as possible. Fix the connector onto the barrel with a movable wrench.
Silicone Caulk
Distribute the silicone caulk evenly around the washer and place it on the hose bib carefully. Make sure the caulk faces the barrel so that it is mounted correctly.
Place the Iron Fitting in a 90-Degree Position
Flip around the barrel. We are utilizing the barrel wrench to eliminate the screw plug. The 90-degree dark iron mounting is presently embedded into the attachment opening. Ensure the track is apparent with the spout opening arranged from an external perspective.
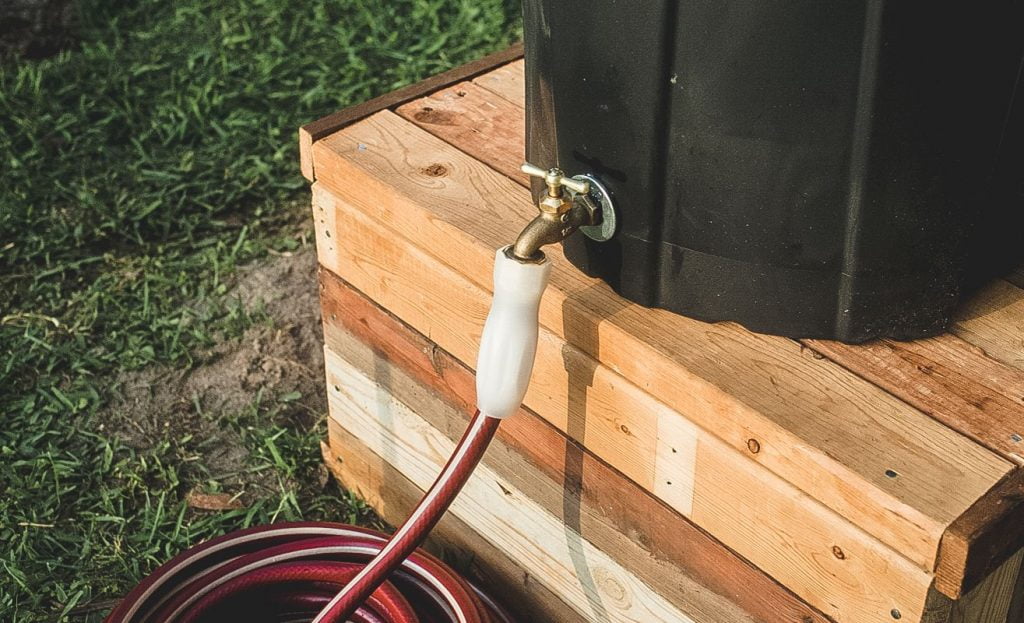
Connect the Hose Bib
This is the most essential component in creating the DIY Rain Barrel. Be sure to do it with care and diligence. Inside the barrel, twist the hose bib and place it carefully. Check if the straight line is there. Now, utilize the side to fix the hose.
Tighten the Fittings
Using the versatile wrench to tighten the hose bib and bring the screwdriver into the barrel. Make sure to check whether the absolute position is accurate or not.
Using the wrench to make the washer stable, and it will be somewhat bent. Be sure that the fittings are not too tight so that the threads fall off easily.
Final Touches
After fixing everything, make sure to wipe up the extra silicone if it is squeezed out of the place. Check if all the fixes are tight enough or not. By following these simple steps, you can easily create your DIY rain barrel.
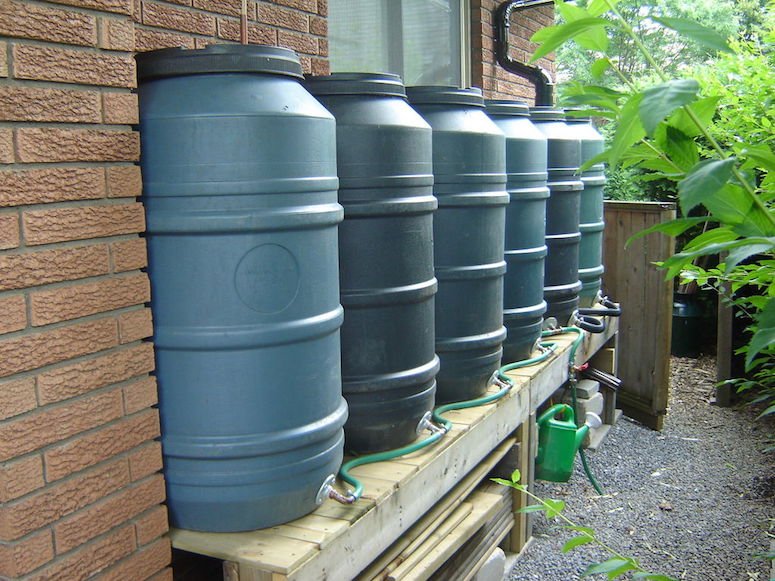
Installation of Rain Barrel
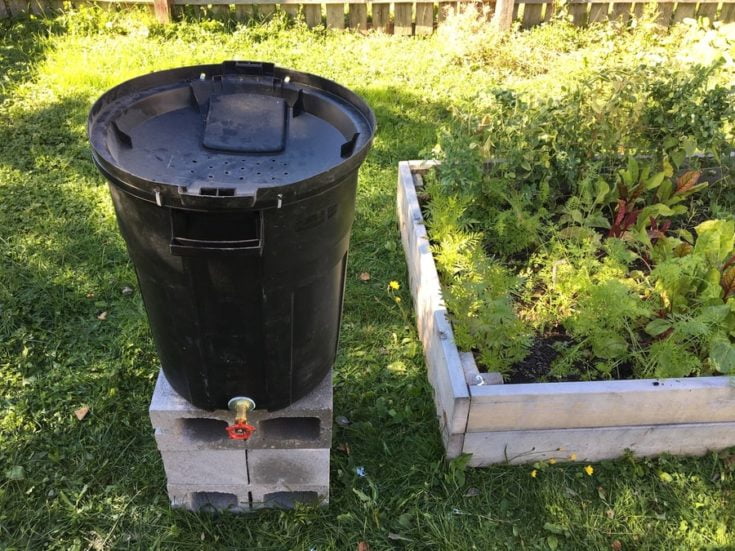
When your DIY rain barrel is ready to use, place it on cinder blocks as per the downspout adapter’s height. You can also buy a barrel stand, which is readily available. Attach the downspout adapter with your downspout.
Now your water barrel is successfully installed and ready to use. Attach the downspout adapter as per your barrel. It can be placed at the top of the barrel. This will create the water pressure and push the rainwater through a hose bib.
Make sure your DIY rain barrel has a lid so that mosquito breeding is prevented. Clean your rain barrel from time to time.
When Is Rainwater Barrel Full?
The most prevalent issue when building the rain barrel is what happens when the barrel is loaded. However, if the rainwater barrel is placed correctly, it can be filled very quickly. So, make sure that when making a DIY rain barrel, select the barrel’s correct size.
Made sure the barrel diverter kit is used. This would interrupt the flow by turning off the diverter until the barrel is finished. In this case, as in everyday situations, water will flow naturally.
There are also overflow valves in some water tanks, from which you can remove the excess water until the tank is finished.
Is Water Safe
The main concern of people who install the DIY rain barrel is that is the rainwater safe to use for a kitchen garden or other chores? Many studies have been conducted to check if water stored in rain barrels is safe to use or not.
Many reports have shown it is safe to use the water from the rain barrels as all the sediments settle down and can be used for a kitchen garden, water plants, or other household chores.
Safety Measures For installing Rain Barrel
If you have installed your DIY Rain Barrel, make sure to follow these measures for a clean barrel and healthy water.
Do not avoid these as it can be harmful on many levels in case your water gets contaminated.
- Before installing check, the complete gutter, fittings, a filter is working efficiently.
- Make sure to put the guard or screen on the top of the barrel so that negligible sediments are entered into your barrel.
- Clean your screen regularly.
- Make sure your filter screen is wholly secured so that insects or mosquito cannot enter the barrel
- If you live in the chilly areas, make sure you disconnect your barrel in the harsh winters, or else it can be damaged. This is important in case you have the DIY rain barrel.
- If you are not at home for an extended period or are not using the barrel for a long time, then open the barrel’s safety screen and drain the excess water.
- For a long time, making sure you do not leave water in the barrel.
- Do not drink or encourage your pets to drink water from the barrel. Please use it for house chores only.
- Do not let your kids or pets play in the barrel. It will be harmful to them.
- Please make sure the foundation of your barrel is stable as it will be massive.


Comments