
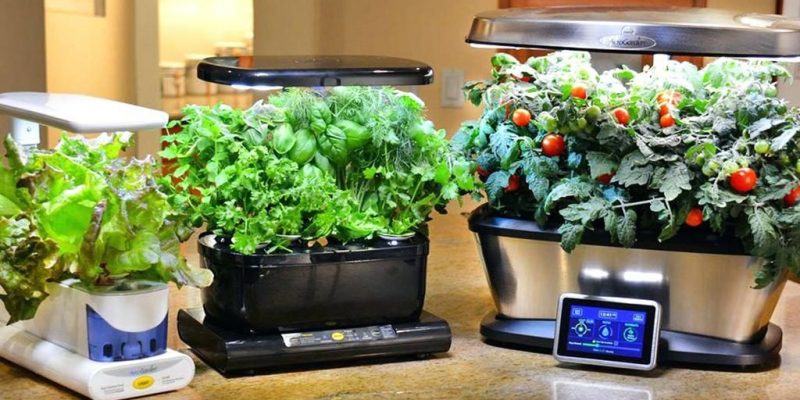
Searching for how to clean your Aero Garden, then you have landed in the right place. Streamlined gardens need to be cleaned thoroughly when harvesting an old crop, followed by a new planting plan.
The container in which the plant was grown can always contain different types of antigens and bacteria. These can be seen on the contaminating sides and the floor surfaces of the bowls. Therefore, cleaning becomes mandatory before planting new plants.
The same type of maintenance is also necessary for the artificial garden when you are put into the rest.
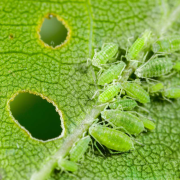
The most important thing to always remember is how to care for and clean your air garden before becoming an air garden. Since these are live plants that you care for to grow, pathogens and bacteria naturally build up inside containers and airborne surfaces.
Not to worry, but you should have to regularly clean spray surfaces by which you can prevent harmful bacteria from taking over your plants. In this article, we will tell you how to clean your aero garden.
So, you can start caring for your favorite plants and grow them for a long time. Your plants will be able to thank you very much because you keep them from getting more robust, and that will be great. So, let us start our article:
What is The Material You Will Need to Clean Your Aero Garden?
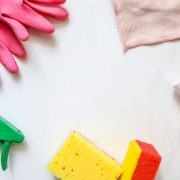
To clean the Aero Garden safely and effectively, you need some of the materials, which is: –
It would help if you had to clean your aero garden in the middle of planting thoroughly, but you have the existing plants, then ginger should be clean and at least around the roots or areas of exposed plants.
The Use of the damp paper towel in cleaning can work very well in the delicate areas, which are more, and you can use the white vinegar and hot water solution.
Large Bowl
A large plastic bowl container is so crucial in submerging the plastic parts of your Aero Garden in the vinegar or bleach bathing and soaking all parts that ensure that every nook and cranes of the head will be cleaned with the help of vinegar.
[amazon box=”B07H8LW4K8″]Bleach or White Vinegar
You can use bleach or vinegar, with the help of which you can clean the Aero Garden effectively. If you keep your plant’s chemical clean and will not use harsh chemicals like the blushes, then using vinegar can be best and will work correctly.
[amazon box=”B01K8HT54G, B087B9VPN4″]Vinegar is a natural cleanser that will help kill bacteria without the help of harsh chemicals. The smell of the vinegar is also not the most pleasant, and the smell is almost undetectable after drying.
Paper Towels
The paper towel will be used for many work like to reach the areas around the seed pod or go under the growing platform. Take care when cleaning around exposed roots, as the roots are sensitive and may be susceptible to cracking or breakage of the plant.
[amazon box=”B07WTXKLKB”]Soft Towels
Soft towels are so important because we can clean the pieces of your plane that cannot be soaked in bleach or the vinegar bath. Clean the aero garden parts that do not work underwater, such as a lightweight hood or a touch screen/meter.
[amazon box=”B07ZWH1SYM”]In this way, you ensure that all your streamlines are going, and you do not get rid of any bacteria or the pathogens which are growing inside and the outer edges of your garden.
Step-by-Step Instructions
Now you have all material which will be used to clean your aero garden. Be sure that you read the Aero Garden instruction manuals and the parts information before designing ultimately.
If there is a particular area you want to clean without taking it separately, that is fine; make sure to stay in contact with the plant or root bits. I would highly suggest waiting and cleaning the air between plantings to disturb the growing plants, but if you need to clean your plane in between, you have to be so much care with the growing plants.
There are six steps which you must follow: –
Step 1: Disassemble
You must ensure that all Aero Garden parts are disassembled and are now ready to be cleaned. Also, you must ensure that the light hood is unplugged correctly. He is also sure that the bowl and aero garden base are also separated from each other and are now ready to be cleaned; if any other pieces are there, they must be removed.
Step 2: Bleach or Vinegar Bath
In the second step, All the parts except a soft hood and bowl must be fully submersible in bleach or a vinegar bath. Then it would help if you filled large containers with gallons of hot water. Also, note that you must make sure the container is large enough to submerge parts of your Aero Garden pieces completely.
The Large or the small containers can be used upon the model of your airplane. To soak the parts, you must add a cup of bleach or also can add vinegar. Pour water by hand or with a large wooden spoon to mix the water or vinegar/bleach solution into all the small corners of your Area garden pieces. Allow the parts to sit for about 20 to 30 minutes for a solution to kill any pathogens or bacteria.
Step 3: Sanitizing the Bowl
Unlike the small detachable parts of the Aero Garden, which can be completely submerged in a bleach or vinegar bath, the Aero Garden contains water in bowls flowing through motors or other devices that make up the hydroponic garden.
Due to the continuous flow of water, the bacteria or the mold will start to begin and then from the inside the base of the aero garden. You must also ensure that all existing water is emptied from the bowl. Pour some hot water and vinegar or the bleach solution om the inside of the base and turn on the motor.
Must allow water solution for 5 minutes to run before closing. Be sure to empty all the solutions under the sink and keep the bowl under fresh running water for a while. Ensure the entire bowl is thoroughly rinsed before adding the water around you to your existing plants or next sprouts.
Step 4: Wipe Down
Now you have done with your bowl, and that is fresh and clean and is ready for your plants or to plant new seeds; it is now time to clean the other surfaces of your retrograde. You must use a soft cloth with vinegar/bleach solution or paper towels, and then you must gently rub the surfaces of your aero garden.
You must be so much care about the sunshades, as LED lights are made up of glass and are so much delicate. Simple cleaning will suffice; there is no need to try to move between bulbs or small spaces. Allow all clean surfaces to air-dry on towels.
Step 5: Removing Parts from Bleach or Vinegar Bath
After 20 to 30 minutes, which was passed, it is the right time to remove all the small parts of the vinegar or bleach bath. Depending on your Aero Garden version, you must have too many or fewer parts than other machines.
You must make sure that all the parts are kept under running water to remove all the vinegar or bleach solution. If you are working primarily on the small parts, you may want to put a stopper in the sink, which you can use to prevent small parts from going into the drain.
Most parts of the aero garden should be large enough not to fall down the open drain, but this is never a precaution. Lay the pieces on a towel to allow them to air dry. Also, make sure that all the parts have dried completely before you are going to remodeling. Gently wipe a dry towel or paper towel over the parts to be sure.
Step 6: Reassemble
Now all parts of your Aero Garden have been cleaned and sanitized, and it is time to make sure your existing plants are healthy and happy.
Make sure that all the parts have now entirely dried before assembling. They are using your machinery guide to ensure that all parts are kept back, and all electrical parts are kept away from the water left in the machine.
Once the Aero Garden is all assembled, then you should be good to go. The machine should start after plugging in, usually or restarting the engine. If the machine does not start for any reason, see the manual. This may be the part that is not holding on properly or something loose that needs to move inward.
You must also keep in mind that you must be careful with water around the electrical outlets and their parts. You do not have to plug or run your machine near an open machine and be sure to clean any spills previously starting or altogether remove the machine from the water on the surface of the counter.
Conclusion
So, this is the full article on how to clean your Aero Garden. I hope you liked the article and understand how you can clean your aero garden. If you have any problem with any of the steps or the material, then please make comments. We are always there to help you.
The steps that are on this are so easy to follow, and with that, you can clean your aero garden with so much easy step.
If you have any more to add to this article on how to clean Aero Garden, you can tell us in the comment section. We would love to add this to add in this article so that everyone who reads this can benefit from your idea.


[…] Cleaning Aero Gardens are very low maintenance because the water and nutrient solution never need to change. It saves time, money on fertilizers, and it is easier than traditional gardening! […]