
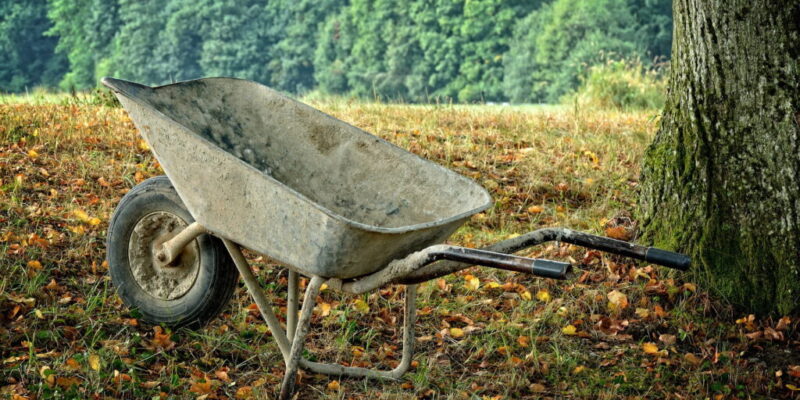
Have you ever considered saving space in your garage or shed while keeping your wheelbarrow easily accessible? Hanging it on the wall is a simple and effective solution. Storing a wheelbarrow can be problematic due to its odd shape, but with the right bracket.
You can have it smartly secured on your wall in no time. This frees up floor space and helps protect your wheelbarrow from damage. So, let’s start changing your storage space and making your wheelbarrow quickly available whenever needed.
Let’s look at these tips; you’ll have your wheelbarrow hanging securely on the wall in no time.
Hanging a Wheelbarrow on the Wall
1. Install the Lower Bracket
To start the process of hanging your wheelbarrow on the wall. You’ll first need to install the lower bracket securely. This bracket serves as the foundation for holding the wheelbarrow in place. Use the provided screws to attach it to the wall, ensuring it’s firmly fixed.
2. Pad Wheelbarrow Legs
Once the lower bracket is in place, integrating garden wheelbarrow designs into your space is a good idea to take extra precautions to prevent potential injuries.
Wheelbarrow legs, especially if they come out, can pose a risk in high-traffic areas. To reduce this, wrap towels around the legs. This simple yet effective measure provides a cushioning barrier, decreasing the risk of accidental bumps or injuries.
3. Mark the Tub Height
Rolling the wheelbarrow against the wall, take a moment to mark the spot where the upper lip of the tub meets the wall. This marking serves as a guide for the subsequent steps. It ensures that the wheelbarrow is positioned correctly for secure mounting. This step is especially important if you plan to use plumbing hooks as your bottom bracket.
4. Set Tub in Lower Bracket
With the lower bracket securely installed and the tub height marked, it’s time to position the wheelbarrow. Align the front lip of the tub with the lower bracket and gently place it in. Ensure that the wheelbarrow is snug against the wall, and then lift the back of the wheelbarrow slightly. This action allows the opening of the tub to rest flat against the wall.
5. Lock Front Lip
Once the wheelbarrow is in place in the lower bracket, secure it further by ensuring that the front lip is properly locked in. This step is crucial for maintaining stability and preventing any accidental dislodging of the wheelbarrow from the bracket.
Take a moment to check that the front lip is securely in position. This ensures that the wheelbarrow is safely anchored to the wall, providing a reliable storage solution.
6. Install Top Bracket
Moving on to the upper bracket, make a small mark at the top of the tub to indicate the placement. Remove the wheelbarrow from the brackets temporarily, and using the provided hardware and a drill, attach the top bracket facing down towards the bottom bracket.
If a screw hook is being used, be sure to drill a pilot hole at the marked point before securing it in place.
7. Secure the Top of the Wheelbarrow
With the top bracket in position, it’s time to secure the upper part of the wheelbarrow. If you’re using a spring-loaded bracket, carefully press the top of the clip to open it while positioning the back lip of the tub into the bracket.
Release the clip to lock it in place. For those using screw hooks, adjust them to the side before positioning the back lip against the wall.
8. Find a Wall Stud
Before any installation, it’s essential to locate a wall stud. This foundational support ensures that the brackets are anchored securely. Without a stud, the brackets may not hold the weight of the wheelbarrow, potentially causing damage.
9. Check Weight Limit
It’s important to verify that the chosen brackets can support the weight of your specific wheelbarrow. Different brackets have varying weight capacities, so selecting ones that can adequately handle the load is important. Especially if your wheelbarrow is made of metal and thus likely heavier, go for brackets with the highest weight limit available. This precautionary measure ensures that the brackets won’t fail under the weight of the wheelbarrow.
10. Lower and Unlatch for Use
When using the wheelbarrow, grasp it by the handles and carefully unlatch the top bracket or screws. Use the handles to gently lower the wheelbarrow until the back legs rest on the ground. This option allows for easy access and use of the wheelbarrow. Always exercise caution when lowering the wheelbarrow to the ground to prevent accidental damage or injury. Working slowly ensures a safe and hassle-free experience.
11. Get Wall Brackets
The first step in this process is acquiring the necessary wall storage brackets. These brackets provide the support and structure needed to hang the wheelbarrow securely on the wall. They can be purchased from local hardware stores or ordered online.
Conclusion
Hanging a wheelbarrow on the wall is a smart way to save space and keep your garage or shed organized. Remember to choose solid brackets that can support the weight of your wheelbarrow. Finding a wall stud is important to ensure a secure attachment.
Take your time to mark the proper height and install the brackets correctly. Lowering and unlatching the wheelbarrow when you need to use it is easy. Just be cautious to avoid any accidental damage.
This method not only helps in organizing your space but also increases the lifespan of your wheelbarrow.


Comments