
Getting your interior walls painted may seem like a tedious task. However, proper preparation and effort to prepare the room for painting can make the task much smoother and more efficient. You will also see that the paint goes on smoothly and your walls look pristine.
You should have plenty of space to carry out the painting task and get all the patches neatly covered so that once the paint looks flawless on the walls. Following certain tips can speed up the painting task and make your walls look amazing.
So, in this article, we have provided some essential tips on how to prepare a room for painting. You will get astounding results from your painting endeavors by following these tips. Let’s get started!
Clear All The Clutter
The first step you should take before you start painting your walls is to clear out the space. For the time being, move all your furniture to the center of your room or, if possible, to another room.
If you are unable to move heavy furniture or would like to keep them in the same room, make sure to cover them properly with plastic sheets. It will prevent getting paint all over their surfaces and ultimately ruining them.
Remove Wall Fixtures And Turn Off The Power
It’s a no-brainer to remove all the paintings and pictures on the wall since you are painting it. You should also take out light fixtures, ceiling fan blades, rugs, carpets, drapes, and any other items on the wall.
Also, remove switch plates and outlet covers as you might get some splatters on these too. You must turn off the power too. If possible, cover the outlet areas with plastic covers to avoid risks from electricity.
Scrap And Clean The Wall
Once you have an empty room, you should start by scrapping the wall to remove the old paint. Begin by scraping off loose paint and peelings. You can do it with a paint scraper or a wire brush. There is also a combination of these two available on the market.
Once you have done the scraping, use sandpaper to get an even and level wall. If there are nail holes, fissures, and cracks in the wall, you might get dust and debris in them. Again, you can remove them with a wire brush and get them patched up with spackling compound.
Clean After Prepping The Walls
After you have scrapped the wall, patched the cracks, and smoothened the surface of the wall, you will see that the room is full of dust and debris unlike your beautiful garden. You should get them cleaned before you start with the painting job.
A scrupulous cleaning of the entire room and walls will remove all the dust, debris, and cobwebs. You can also give a wash and vacuum the room to ensure it’s thoroughly cleaned and nothing will stick to the freshly painted walls. 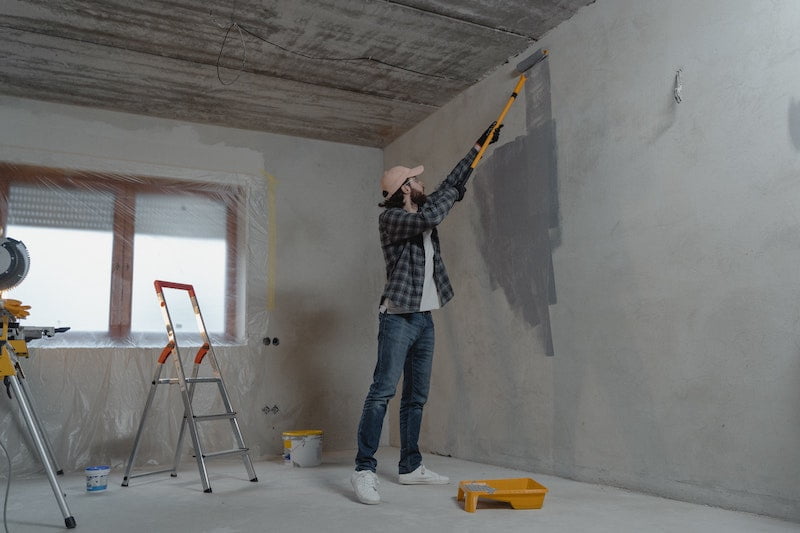
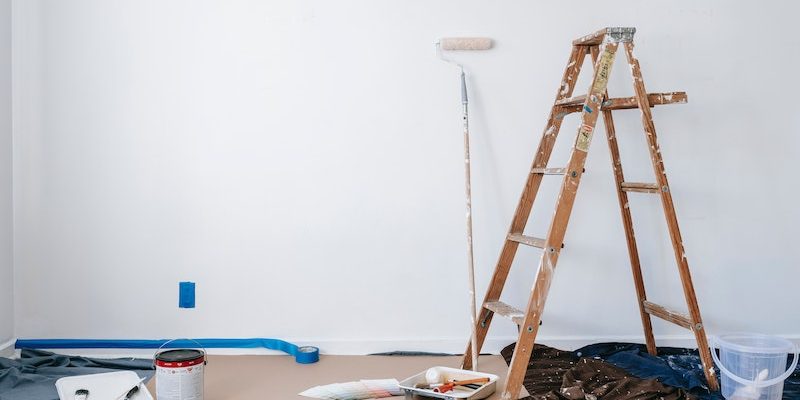
Cover The Floor With Plastic Sheets
Place plastic sheets on the floor to protect its surface from paint splashes. It will also protect your floor if the paint falls on it accidentally. You should ensure that the plastic sheets are not slippery.
You can also use drop cloths on the floor that will work as additional protection for your floors. You can cover the entire corners of the room with drop cloths and tape them if necessary to avoid paint leaking onto the floor. Finally, you can use heavy-duty canvas.
Gather All The Paint And Tools In One Corner
To avoid clutter and mess, you should keep all the painting materials and tools in a separate corner of the room. It will make the environment stress-free, and you can work peacefully without worrying about making a mess with fresh paint.
You can keep the paint and tools on the floor where no one will walk around and bump the materials. Alternatively, you can set up a table where you can put the roller trays, brushes, paint, dry and damp rags, and rollers separately. You must keep this area as clean as possible.
It’s Time To Prepare The Wall For Painting
Before painting, start by taping and masking areas of the wall where you don’t want the paint to seep. You can use painter’s tape to cover electrical caskets, light fixtures, switches, outlets, and other potential areas.
Use masking tape around the edges if you plan to paint different colors on different walls and ceilings. You should also mask the edges of the windows and doors to avoid getting paint on them. Sealing the edges of the paint with putty will prevent the seeping of paint inside the tape.
Things To Keep In Mind Before Painting Your Room
You might think that the tips provided above are sufficient to get you started on your room painting project. Although these tips will improve the efficiency of your painting task, you need to keep the following things in mind before beginning to paint the walls of your room.
● Buy top-quality primer, paint, airless sprayer, and caulking compound that will make your walls last longer. You should check the materials’ warranty and expiration date (paints do have an expiration date!) for high efficiency.
● Get the appropriate tools for the painting task. Using high-quality paint and cheap tools will not give you the desired results. Instead, you must choose the right tools of good quality that will give your walls a flawless and smooth finish.
● To avoid drips and patches on freshly painted areas, you should always begin painting from top to bottom of the wall. If you plan to paint the ceiling, start from there and work your way towards the bottom of the wall.
However, you can always seek professional help from a reliable interior painting company like A Perfect Finish Painting to get better results.
Wrapping Up
Once you have done all the prep work mentioned in this article, you are ready to start painting the wall. However, there are some essential things to remember before painting.
You should use a primer and use the appropriate tools to get the best results out of your painting projects. If you plan to paint the doors, you should remove all the knobs and locks.


Comments