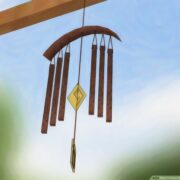
Any morning of a breezy day, your mood might be gloomy, but if there is a Wind Chime in your home. You already know that your body dances with its tunes, cleaning your gloominess out. All it needs is some breeze to make the melody ring.
The melody lines in a simple mechanism depending upon its string. It feels blissful and something spiritual to rest, closing your eyes, listening to the rhymes of the chime. But if you got too addicted to its music, fearing that you would lose it one day is relevant. But you need not worry, for there are ways to revive its tunes.
Yes, your Wind Chime has not met its end just by a broken string. Might the wind be strong or harsh, leads to the rupture causing the strings to break. Wind, rain, and even sun, anything heavy can damage your chime. You can have simple remedies to resurrect the music in a few simple steps.
Step 1: Removing the Old Strings
Put the chime flatly on a table or any surface that you are comfortable with. Start pulling the string out carefully through the holes and attachments. Few knots might need scissors, but it can also be pulled out with bare hands.
If there is only a part of the string that was broken, then the portion that is broken can be detached without removing the entire string. But a few may prefer changing the whole string; it is advised to change it all.
Step 2: Place the Pieces in Order
After removing the entire string or a portion, the tubes are now independent of the link. They need to be re-organized in the same way before to avoid confusion. It is best to organize it flat while pulling the string out. It makes the work easy and saves us from the trouble.
The chime usually consists of a ring hook that is used to hang it somewhere, a suspension platform (the top ring), tubes, a clapper (the ring or thing that hits the tube making the music), and finally, the sail (the one that is below and is exposed to wind to move the clapper). All the chimes consist of these parts and in that order only, respectively.
Step 3: Choosing the String
The string can be chosen as it can be of any regular type. The strings of wind chimes are usually nylon or polyester threads sold for fishing or archery. They need to be durable and robust. But mainly, they should fit in the tubes and rings.
Your actual wind chimes might have been tied with natural types of fibre, but synthetic replacements make them last for more period. You can choose the types and gradations available in strings by calculating your budget. There are expensive strings that are as costly as a new windchime! But there are also durable fibres that are pocket friendly.
Step 4: Measuring the Thread
After securing the fibre and arranging the chimes in order, you need to obtain an upholstery needle. Your string should fit the needle and hook the string up with the needle. The top ring holds all the parts together. So measure the string with the top ring and all parts. Make sure it is balanced.
Step 5: Knitting, Chime!
This step is the most important for retuning the chime. Few chimes have drilled holes in them, and you don’t need to put holes separately. But, few are just joined separately without holes. Talking about the chime with holes, you need to push the needle carefully through the holes of the top ring. The top ring is important because it is the part that holds all the chime together.
The top ring might have many holes, depending upon the number of tubes it contains. The holes for joining tubes are on the edges of the ring. The string is to be pushed through each hole, and the tubes are to be knotted. Even a regular knot will do the job. If you are not confident about the tube, gluing the knots might help.
There is a hole in the centre of the top ring that allows a string to suspend from above. This string joins the clapper and also the sail. The clapper is to be carefully knotted, and there must be enough string left to knot the sail below. Now hold the wind chime with the hook given if it is perfectly balanced and straight. You have done your job well! The chime is ready! But not yet!
Step 7: Tune. Check!
Just like a guitar, you need to see if the tune is all well. Tap the sail and let the clapper hit those tubes. Listen to it properly, and sometimes they might not make a sound at all. If the strings are loose and the tubes are hanging odd, the tune might be quite bizarre too. Tight the knot and tighten the tubes to change the pitch of it. You can change the pitch till you like it or till the old rhythm is back.
Step 8: Hang Them!
There is no DIY involved in this step. All you need to do is to hold the chime with the ring hook and take it to the place where it was. Hang it back. All you need to do now is once again rest, closing your eyes, listening to its tunes, and feel spiritual!
But if the wooden chimes do not have clappers and there are no holes in it. It means that it is a different kind of chime. It is a type that needs to be joined individually than all together. It would help if you had small strings that are enough for the tubes and other parts separately. The pieces are then stapled to the base/top ring.
Restringing these chimes is simple and does not even require changing the whole string if any one of them is broken. The broken piece is the only one that is replaced. Usually, the chimes that come this way do not have top rings, and they come with a wooden base. Or any solid base that holds all the tubes down.
Relive the day, resurrect the dead chimes!


thanks! Neat windchime looks HEAVY!
[…] For detailed steps on constructing and restringing, see our complete DIY wind chime guide. […]
[…] those needing repair, learn how to re-string a wind chime if the weather affects […]
[…] If your wind chime has broken due to strong winds, you might need to re-string it. Here’s a guide on how to re-string a wind chime. […]
[…] are some popular types of wind chimes and considerations, such as how to re-string a wind chime, ideal placements within your home, and maintenance tips to help you decide on the best choice for […]
[…] Explore the science behind wind chimes: understand why they chime, discover what they are made of, and learn how to re-string a wind chime. […]
[…] This comprehensive guide explores various metals and provides detailed instructions on re-string a wind chime. […]
[…] will also provide detailed instructions on re-stringing a wind chime and explain its impact on overall […]