

Most of us have fantasized about having a treehouse or a bunker, about being more specific—a private space away from the world and lost in your world. The city underground is even the most famous wish from our childhood. Well, we cannot build a city by ourselves. Neither can we build a bunker without pouring lots of money?
But we can create a room, an underground space right in our backyard. And it can also be camouflaged from the world. All we need is patience and some digging tools. And of course, a backyard! Or an empty land which is ours by right.
We should make sure we are not digging into the areas that do not belong to us. Right before we go into the digging, we need to check where to dig. Concerning the desires of our inner child, let us still call this room as a bunker, unhesitant!
Do not Step on the Gas Line!
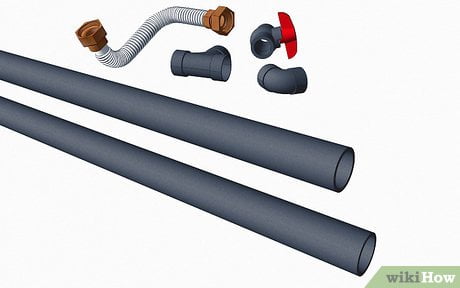
Image Source – https://www.wikihow.com/Install-a-Gas-Line
No matter if we forget, there are lots of things going on underground like sewer lines, gas pipes, and water lines. We should make sure that we do not break them in the urge to have an underground room. It is better if we take an extra measure and grab the house plan to checking where these lines are placed.
If our area is filled with such lines, then it is bad news for us! But no need to worry because no place is filled with pipes. There is always space for a small room underground. We need patience and the right eye to spot the area.
Setting Goals
Well, this should be on top, because if your goal is to build a city underground, then the only spot without any gas lines will not do it for you. But we are looking for a small bunker, a private box to hide our heads. We need to calculate how much of a room we can build from the spotted pipe-less area.
It is not a great idea to DIY a room bigger than 6 feet, as it has higher chances to collapse. Also, it takes ages to dig that deep, and it sucks out lots of energy. The length and breadth should be equal parts in a ratio like 2X2, 3X3, 4X4, and 5X5. Only if the ratio is in equal proportions, the room will stand. Mark the area you want to build.
Let the Shovel Sink In!
It is now time to dig the marked area. We now start digging with a shovel. We should try sinking the shovel deeper to take out more mud. Remember, if the mud is too wet and mushy, it is better to drop the idea of having a room.
Soft mud is not ideal for digging. Only hard and ordinary mud is encouraged to be dug. Digging takes lots of effort and is not a work of a single day as we are talking many feet. It is better if we have a companion with us, as the progress is doubled.
If you decided to take a break, the pit must not be left without a cover. There can always be a chance of rain, or the wind might bring dirt on it. It is still better to cover the pit with a sheet. There is a chance of someone not noticing the hole and trying to walk on the cover.
They might fall, and this can be avoided by putting some warning boards on the sheet. It does take a night’s break or two sometimes. We better not over dig and go out of the marked area. Dig, dig, and dig till we finally dig the ideal room we dreamt.
Bring the Walls Down
To set-up anything down there, firstly, we need to surface the irregularities. The floor and walls must be leveled so that we can wall them up. Shape the walls properly in a square.
We can now bring in some thick wooden sheets that can be used as floor, walls, and ceiling in your room. The roof must be a bit wider than the walls and base as it has to stand. We now drill holes and nail those walls together, making an underground box. Suppose we hate the idea of just being in a wooden box underground.
We can leave the room muddy but leveled and only cover the top with a sheet of wood. We can create shelves in the walls of mud by digging boxes. Leaving the insides without wood helps us give more space. The roof can be a push or slide, or you can create a small door on it.
Designing the Interiors!
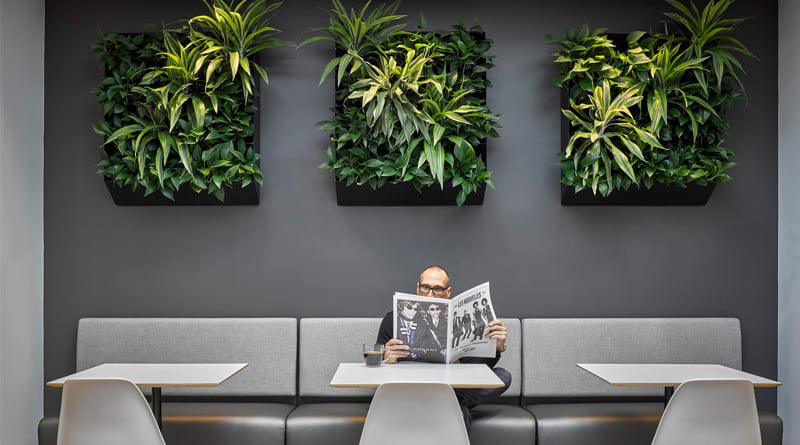
Image Source – http://greenbuildingnews.com/2018/03/07/beyond-health-wellness-designing-interiors-human-thriving/
After choosing and creating the room and roof, we need to start making our room live-able. Firstly, let us drop a ladder or create blocks to use as steps to get in and out quickly.
We can use solar lamps or battery lights for light inside. It is safe and advised to create ventilation by drilling a hole and putting a pipe out. If there is enough space, we can arrange for a seat, have a carpet, and maybe even a small desk to write and read.
If put on wooden planks as walls, it will be an add-on to paint those planks. We can also put some pictures and paintings on the walls. Add furniture and decorations that fit, and the goal is to make the room cosy. I painted in the right way; it can even be a small studio for your pictures!
Our underground room is ready, and it is for us and our ideas to use it now. Our childhood dreams of a bunker are now fulfilled, and we made it ourselves in our very own backyard!
But it is always advised to let someone know you are in there before you get in. Also better to carry our phones down there. We cannot drift away from precautions on the verge of enjoying. It is not to worry but to be cautious. Better safe than sorry!
Time to hibernate in our cosy underworld!


Comments