Taking care of your tools and equipment is very important to make them last longer.
Good quality gardening tools can last for many years, and they do not take much effort to clean and sharpen.
Pruning Shears are considered one of the best gardening tools which can be used by gardeners.
It does not take long for the pruning Shears to get dull and lose all their sharpness. So, it would be best if you sharpen your Pruning Shears at a regular time interval.
In this article, we will discuss the basic tutorial and a step by step process, explaining how to sharpen a Pruning Shears with a file’s help.
What You’ll need to sharpen Pruning Shears
It is effortless to sharpen your pruning shears and does not take much time to do so.
You do not have to purchase any additional product to Clean your pruning shears as all the necessary items are already available in your home.
1. Your Pruning Shears
Firstly, you will need the Pruning Shears as you must keep in mind that this tutorial is only helpful only for those garden tools which have cuts or blades in them.
2. Sap Remover or Foamy Soap
It is essential to clean your Pruning Shears before starting the sharpening process. It is recommended to use any foamy soap, or you can also purchase any sap remover. Both will be equally beneficial.
- Stoner Car Care’S Tarminator Goes To Work Quickly To Remove Tar, Sap, And Asphalt By Using...
- Safe For Clearcoats: Unlike Most Harsh Chemical Cleaners, Tarminator Is Easy On Paint And Safe To...
- Use Safely On Paint And Chrome: For Car Owners With Chrome Bumpers, Finding A Powerful Tar, Sap, And...
- Fast-Acting Grease Remover: When Time Is Precious, Tarminator By Stoner Car Care Doesn’T Delay....
- Contains (6) 10 ounce bottle of foaming hand soap
- Foaming hand wash with plant-based cleansers.
- Biodegradable formula made without parabens or phthalates.
- Bottle (minus pump) made from 100% recycled plastic (PCR).
- Leaves hands feeling soft, clean + sublimely scented.
3. Blade Sharpener or Metal File
Blade Sharpener or Metal File is one of the essential tools in this sharpening process. You can choose any one of the tools to sharpen the Pruning shears.
- ✅VERSATILE – The most versatile sharpener in the market to sharpen and hone both single and...
- ✅SUPERIOR SHARPENING PERFORMANCE – As blades vary from different angles, shape, single or double...
- ✅DURABLE – All sharpening abrasive materials pass 10,000 times field use test. NEVER WEARS OUT
- ✅SAFE & COMFORTABLE USE – Oversized handle allows for use with gloves. Large hand guard to...
- ✅3 YEARS of Commitment and Superior After-Sale Service: Sharpal, headquartered in CA, US with...
4. Wire brush or Coarse Steel Wool
For cleaning away all the Rust from the blades, you must need a Wire brush or Coarse Steel Wool as both the tools are equally beneficial for the buffing process.
- 👍12Pcs Economic Pack: Package include 6 brass brushes and 6 stainless steel brushes, total 12pcs...
- 👍Wire Brush Size: Silimar to Toothbrush size, the brush handle length is 13cm/ 5.1inches, the...
- 👍Wire Brush Material: The brushes are made of stainless steel and copper brass differently,...
- 👍Comfort Design: Non-slip finger grip handles design makes the user feel comfortable when using...
- 👍Wide Application: Brass bristles can be used to clean unfinished metal parts, paint stains,...
- ✂ COST-SAVING SOLUTION: The steel wool can be used to block holes of any shape and size. Then you...
- ✂ WIDELY APPLICATION: Steel wool pads can fill common critters entry points, which effectively...
- ✂ EASY TO USE: Easy cut and install,You can use scissors to cut steel wool to a suitable length....
- ✂ MATERIAL: Steel wire wool are soft, thick and fluffy, and can be bent to corners or around....
- ✂ PACKAGE: Two separate 10 foot long pieces steel wool, a pair of gloves. NOTE: check cracks and...
5. Something to test your Cuts
After the completion of the sharpening process, you must test it out if it is working correctly or not. For that, you need something challenging for the blade to cut, such as foliage from irises, yucca, etc. Any of these products work very well to test the sharpness of shears.
Cleaning Your Pruning Shears
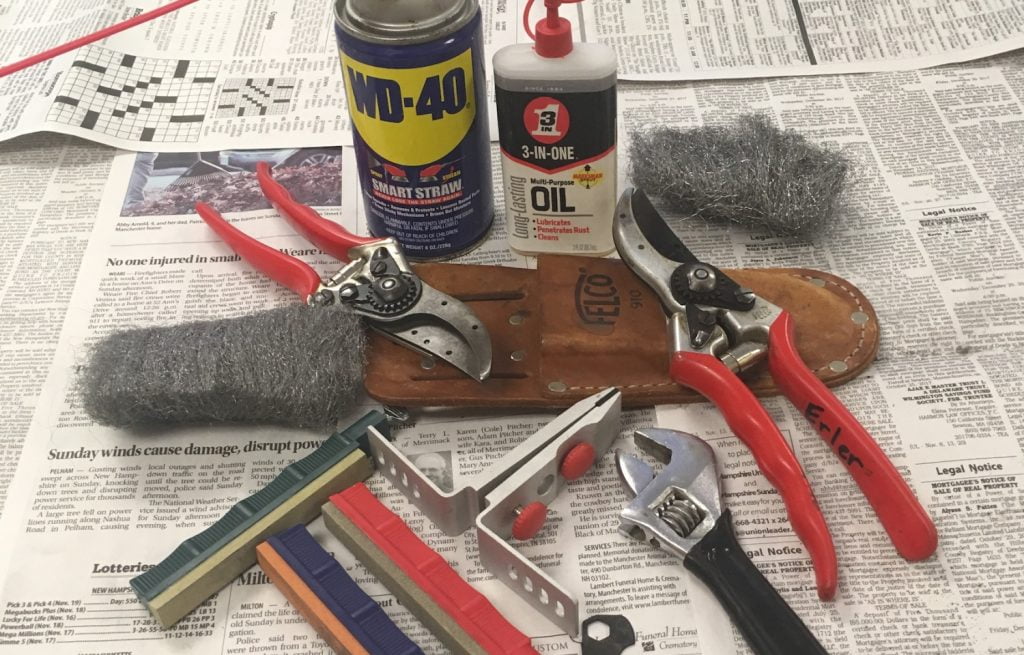
Before sharpening the shears, it is good to clean them first, which helps remove the rust and dust particles to some extent. The Cleaning process also helps in their best functioning.
Scrub the Blades with Warm Foamy Soap Water
Before attempting the cleaning process, dip the shears in the foamy soap water. For this, you just need to fill a container with two tablespoons of dish soap and water, mix it well and then dip the shears into it and scrub both the blades carefully.
Rinse the Blades
After the scrubbing process, you must make sure that there is no amount of soap left on the shears; otherwise, it creates some issues in it is working. You must rinse both the blades thoroughly with cold water and repeat the process until all the soap is removed from the blades.
Dry the Blades
Drying the blades after the cleaning process is one of the essential steps, and for that, you can use any dry towel or cloth. You just must provide a gentle wipe to the shears until they are dehydrated. You will have to take some precautions while drying the blades and make sure that you do not cut yourself.
Buff Off Any Rust
After all the cleaning and drying process, you must make sure that no Rust amount is present on the blades. You need a small piece of coarse steel wool to buff the Rust carefully. After the buffing process, rinse the blades and dry them again with a towel.
How to Remove Rust from the blade
It is not a very difficult process to wipe out all the Rust from the Pruning Shears’ blades. For this process, you just need a Wire Brush or Coarse Steel Wool to remove all the Rust, which is available on the blades’ edge.
The Coarse wool itself cleans most Rust, and the Wire brush is used to remove all the thick and chewy Rust from the blades.
The Rust removing process is not a time taking process as it takes only 15 mins to clean up all the Rust. After completing the process, you can apply some amount of grease to it to make it look new.
How to Sharpen Pruning Shears with the Help of a File
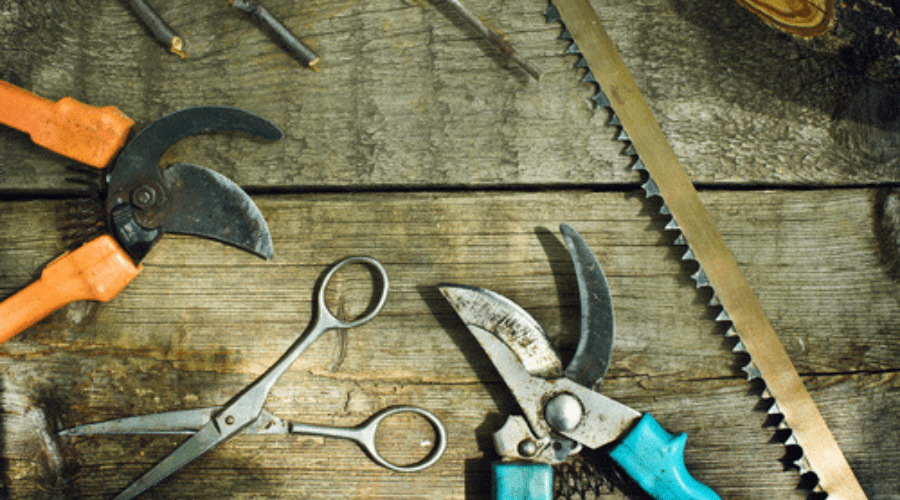
For sharpening the blades with the help of a file, you need to follow the step by step tutorial provided below:
Step 1: Secure the Pruners in a Bench Vise
Securing the pruner in a bench vise will help in sharpening the blades safer and more comfortable. You just must comprehensively open the shears, and you must make sure that the edge of the blade is facing towards you.
Step 2: Position the File
For sharpening the file, you will need a medium-sized hand file. You just must position the file against the cutting blade and make sure that the shear’s blade is at the same angle as the file. You always need to maintain the same angle during the sharpening process.
Step 3: Draw the File Along the Contour of the Blade
While drawing the file toward the blade, you have to ensure that you always keep the file at the same angle during the entire stroke and make sure that the file is away from your body. You do not have to apply enormous pressure on the file. One stroke of moderate pressure is enough.
Step 4: File Until a Sharp Edge Forms
You must continue the drawing process with the file until you form a sharp edge on the blade. It takes almost 15-20 strokes of the file to create a sharp edge, which takes several minutes to complete the process.
Step 5: File Off Burrs on the Blade Backside
After the sharpening process is completed, you will have to remove all the burrs created on the backside of the blade. You just must turn the shears backward and apply some strokes from the file to remove all the burrs.
Step 6: Finish with Linseed Oil
After completing the whole process, you must wipe the Pruning shears’ blades with linseed oil to avoid rusting. You just need to dip a small piece of cloth in the oil and wipe it gently over the blades. Now, you must let the blades dry until you can use them again.
Final Words
It is effortless to sharpen your Pruning shears with the help of a file. It is essential to take care of your tools so that they can last long.
You only must remember that you must clean your tool first and then start the sharpening process.
Following this method, will ensure that you will get the best quality edges for your shears.
I hope you find this tutorial useful, and If you did, then don’t forget to share it once; if you have any doubts/questions regarding the sharpening process, don’t forget to paste it in the comment section below.
We will try our best to solve all your queries.



[…] internet. There are websites and programs designed specifically for problem solving. You can get solution of everything like how to sharpen pruning shears and a lot […]