
Creating your own schedule board that is geared towards your children/ family doesn’t have to be hard. It can be a family communication board, weekly calendar, chore board for the kids, or combination board, or planning board like I created.
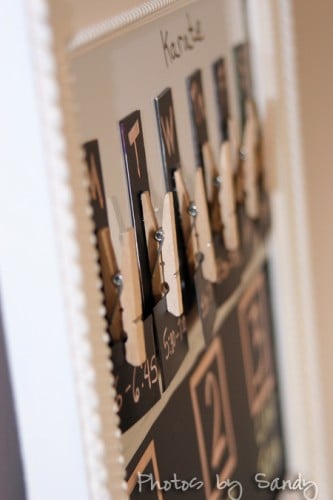
I made karate calendar / job board for the triplets. Their karate schedule is different most every night and yes they do other things as well other than building fascinating treehouse ideas. It also changes a couple times a year.
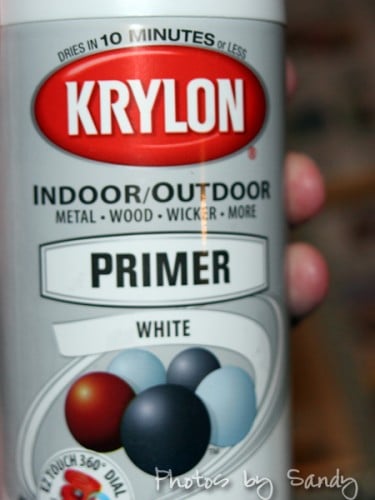
I started off with finding a frame. I had one that I really liked, was the right size, but the color wasn’t right. So… I spray painted it.
This is what I used for primer. I also got the Krylon paint.
I used an Dover white gloss spray paint and it took several coats.Step 2: Gathered your other supplies
I had the frame, Chalkboard Contact Paper, 18″ x 6′ and the Liquid Chalk – Works like a Marker Dries like Chalk – Set of 8 Earthy Colors ,a glue gun, an x-acto knife and cutting board and a ruler. I also purchased a long narrow magnetic dry erase board that fit half of the frame.
But I also needed a few other things. I had purchased this Elmer’s Tri-Fold Foam Display board from Walmart for another organizing project like small chicken coop plans or anything like that I am planning in the future. I knew I wouldn’t use it all for that project, so this would work perfect. It is light weight and thick enough.
I also bought some small self laminating sheets.
I had magnets that you can adhere your business card to.
Then I found those cute small clothes pins when I was in Walmart too. They were just too cute. I also bought 3 yards (I didn’t need all of that) of a thicker ribbon and some thinner robe like ribbon (for the name cards) along with white hooks.
Step 3: Measure the space that the Elmer’s foam board needs to be cut to fit.
First position the dry erase board where it will fit. Then measure to cut the foam board.
craftI used the X-acto knife to cut the foam display board. It made it easier than scissors to cut and you get a cleaner line.
xacto
Step 4: Cut the chalkboard contact paper to cover the Elmer’s foam board.
chalkboard contact paper
You don’t have to cover the back of the board too. Just bring around the edges and make sure you have a smooth surface on the front without wrinkles or air bubbles.
chalkboard contact paper
Wrap the edges under and then on the ends I did trim off some of the excess contact paper with the x-acto knife. I didn’t want to take off both layers, I just wanted to thin it down when I folded it over.
chalkboard contact paper
Step 5: Position the two boards into place.
I first cut a piece of ribbon that would cover up where the two surfaces meet and hot glued to the dry erase board. I positioned it so that it was half off the dry erase board.
I put hot glue around the inside ridge edge of the frame where the boards would lay.
I then placed the dry erase board with ribbon attached into the frame (good side down). I then put the chalkboard covered foam board into place. I first hot glued the edge of the chalkboard foam piece that would meet up against the dry erase board. Once they were in place I held it up without turning it over to make sure the ribbon was in place and then pushed on it to make sure it would adhere to the chalkboard piece. This is what the back side now looks like.
I also gave a squirt of some hot glue in between the crack where the two pieces meet.
Turn it over carefully once it has dried and this is what it looks like at this stage. From here you can customize it. You may want to leave the top blank for hand written notes or magnets. (See the ribbon across the middle?
Step 6: Put the screws in place.
I just purchased the small hook screws. I didn’t need to pre-drill them, I just positioned them and screwed three of them in the bottom, one for each of the triplets. Then two across the top for the ribbon to tie onto to hang it.Step 7: Make the Name Cards
I got out some of my old business cards and used those. I put two of them together for a little thicker base. Then I covered those in the chalkboard contact paper.
Once I covered three of those I cut the thinner ribbon to the length I wanted. I did bring it down the side of the business card to fully measure.
I then wrote each of the kids names on the chalkboard covered name card in the chalkboard markers. Be sure to let them dry completely before you complete the next step.
chalkboard markers I then opened up one of the laminating cards and placed the name card upside down on. I placed the string down along the edge of it and then covered the laminating sheet. Be sure to tuck the other side of the string down.
Step 8: Make the clothes pin magnets
I again took one of magnets for the business cards. I covered the sticky side with a piece of the chalkboard contact paper. I then cut it into two strips length wise. I then used the hot glue gun and glued the clothes pin onto the chalkboard contact paper covered side.
I made one for each day of the week. I only used Monday – Saturday on my board though. The kids don’t have karate on Sundays, so I didn’t want to crowd them.
Step 9: Make the small cards with the time on them.
I then cut up some of my old business cards in half. Covered those with the chalkboard contact paper and wrote the times on those.Step 10: Write the jobs on the chore board.
I put a number 1, 2 and 3 on there, because the triplets change seats at the dinner table. They will have their seat assignment, and chore for a week at a time.
chore boardRemember if you mess up, you can use a wet cloth and erase .. and start over.
Isn’t it cute? I am really excited about using it. It is going to go against a periwinkle wall when my dining room is finished.


Comments