
Today’s world is all about DIY, whether it be building hot tubs or garden projects. Did you know that you can create your DIY concrete projects? When listening or thinking about concrete, only one thing comes to mind: the vast cement mixtures used in construction sites.
One only thinks that concrete is used only in building houses, but it is not like that. With the help of concrete, you can make household things that will enhance your home’s decor.
Working with concrete can prove satisfying, but the durability of the material should be kept in mind. Satisfy your crafty mind with these DIY concrete ideas.
Concrete is a type of material that allows you to shape anything in any way without much effort. Let us look at some of the DIY concrete project ideas.
Concrete Stool
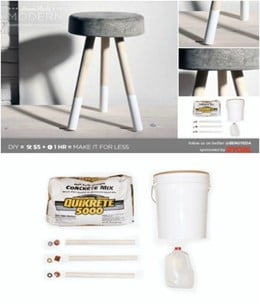
This concrete stool is perfect for a workshop and can be made for $5. It is easy to make, as well as cheap. What do you want to do? Pour concrete into a five-gallon bucket, and then add legs that you have cut from a single dowel.
After drying off the concrete, pull your new stool out.
You do not need too much concrete so that you can make several stools from one bag of best concretes and best concrete sealers for 2021.
This DIY concrete idea is simple, durable, and pleasing. In this project, there is less wastage—no need for too much energy to make this.
Concrete Bedside Lamp
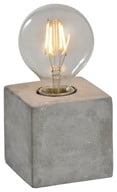
A lamp can be made easily by yourself with the help of simple tools and materials. Some steps must be followed to achieve fair and better results.
How to make it? Firstly, you will need a wooden board (14 cm wide and 80 cm long). Saw five pieces from the board (4 pieces 14×16 cm and 1-piece 14×14 cm). Assemble these pieces by drilling holes where you want to set screws, screw all wooden pieces together to the box.
One reminder, all inner joints should be sealed with silicone to avoid water escape. Then glue the socket on the bottom inside the box, finally cover all lamp sockets with waterproof tape. Now, you need almost 6kg of concrete mix and fill it in the box. Then leave it to dry. After drying, disassemble the box carefully and connect the wire.
Simple and easy DIY concrete idea! The unique lamp will add charm to your room.
Concrete Magnets
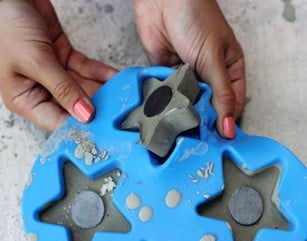
You can create your magnets out of concrete. For those who love magnets very much, this DIY concrete project is especially for them. What do you need to do for this project? Silicone ice cube tray, concrete mix, magnets, a bucket to mix concrete, stick for stirring, cup to scoop concrete.
How to make it? According to instructions on the packet, Mix cement pours some water at the bottom of the bucket, then pour cement mix till it reaches a consistency. Then scoop the concrete out, and each compartment of the silicone tray should be filled.
Set it down till the concrete reaches every corner. When concrete starts to set but should be pliable, push the magnets in and wait for a full set. Then take out the magnets of the silicone mold and make their edges smooth.
And that is it! It is ready to stick on the fridge. It can be painted as well—an excellent DIY concrete for kids.
Concrete Cake Stand
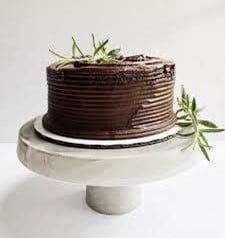
You can make a cake stand out of concrete, and it does not need too much concrete, and the items needed to mold it can be fetched from the kitchen.
How to make it? Start with a concrete mixture in a bucket according to packet instructions. Use this mixture to fill a cake pan and plastic cup. The use of tinfoil will make removal easy.
Pour the concrete in and leave it to dry for 24 hours. Then remove cups and use a concrete glue bond to attach the upside-down cup to the plate to create a cake stand. If you want to make a cake stand food safe, then be sure to use a light layer of concrete.
It is ready! These DIY concrete cake stands are great for weddings and other parties. Comfortable with making and looks lovely and durable also to display your baking.
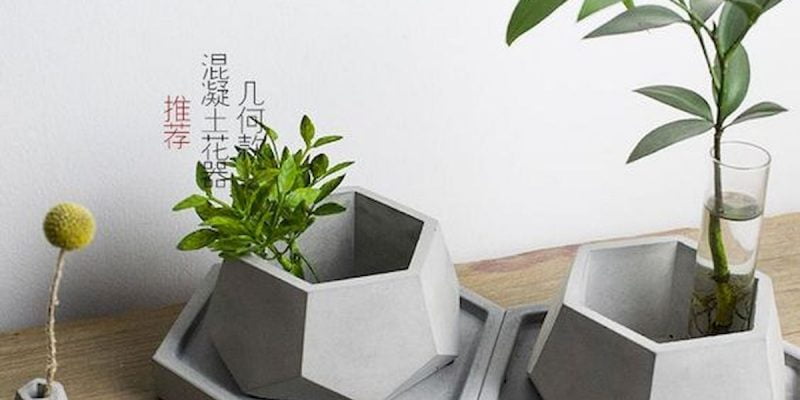
Concrete Bowl
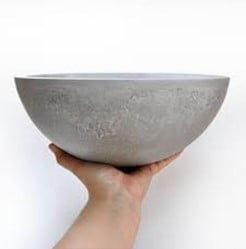
You can also create a bowl of concrete and a few other supplies. It would help if you gathered all these supplies: – water, flexible rubbery bucket, plastic bowl, gloves, canola oil, paper towel, container, stick, scoop, cement mix.
How to make it? Firstly, prepare a gallon of water, then use a paper towel and coat inside a rubbery bucket with canola oil. Both inside and outside of the plastic bowl should be coated with canola oil. Put your gloves on.
Follow the instructions on the bag of cement and add water slowly. Once the consistency is made, scoop the mixture into a bucket, then place the bowl in the center of the bucket. Allow it to dry.
This DIY concrete project will make gorgeous pieces of art. And you can make many bowls from one bag of concrete.
Note: This Concrete Bowl is not for Food Purpose.
Concrete Bracelets
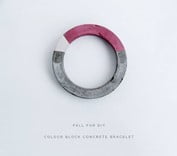
If you are in love with jewelry or want to gift someone else, these concrete bracelets are perfect. It was made in bangle style. Measure wire using a silicone mold and wrap it to fit in the middle of the mold.
Then mix concrete and fill the mold in half. Place the wire on top of concrete and then fill mold till the top. Leave for 48 hours so that it becomes hard, and then carefully remove it.
That is it! They are not so heavy, and you can paint them as per your choice—perfect gift idea who likes jewelry.
Concrete Fire Bowls
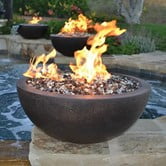
Nothing better than to relax on your couch and have a small fire, right? Much cheaper than anything that you buy from a department store. It would help if you had concrete, a bunch of rocks, a plastic bowl, cooking spray, newspaper, a sizeable canned good, a plastic tub, and a stick.
How to make it? Measure concrete, full plastic bowl, dump mix in mixing bin, add water; stir with a stick’s help, spray all over mold and canned goods. Then pour concrete into the mold, pour halfway, and place a sizeable canned good in the center. After 6 minutes, rotate the can and pop it out. Cover the mold’s top with newspaper. Place loose rocks along the rim, drop the fire gel in the center hole, and light it.
And it has done! They are the size of a tabletop, so you can make as much as you can from a single bag of concrete.
Concrete Countertops
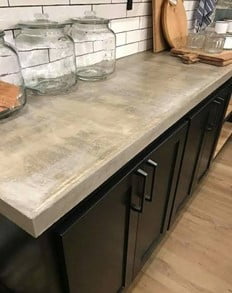
Hate the old look of countertops? You can make your concrete countertops. It is fantastic, but it is expensive. It would help if you had a concrete mix, carnauba wax, sealer, sandpaper, trowel, old door, or wood base.
How to make it? Be ready with a concrete mix, spread it thin to the old wooden door, and make sure to make it smooth. Let it dry, and do not forget sides. Repeat this process four more times. Before applying another thin layer, do not forget to sand the dried concrete area. Fill the uneven lines with a thin layer of concrete, let it dry, and make it smooth by applying sand. Add carnauba wax and brush sealer for protection.
And it has done! Perfect for bathrooms and could be added to kitchen counters. Great DIY concrete project idea.
Concrete Garden Balls
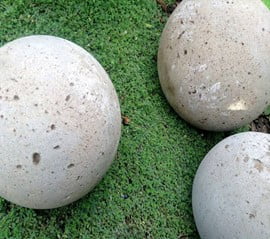
Some people have a passion for decorating gardens with spheres and mirror balls. These DIY concrete balls would fit in nicely. It would help if you had round glass light globe covers, peat moss, Portland cement, oil, bucket, stirring stick, gloves, hammer, eye protection.
How to make it? Firstly, lay protective covering like a trash bag, apply any oil to the inside of glass globes. With the help of a paper towel, coat all the surface of the globe, not excess oil, mix your concrete (¾ concrete and ¼ peat moss).
Mix with water till it becomes thick and pourable. Pour mixture into glass globes. Let them dry for 3-4 days. When dried, remove the glass with a hammer, eye covering, and some other protective surface.
When done, a pretty and shiny globe will come out. Fun and easy to make, concrete can be proven as messy, but results are excellent.
Concrete Easter Eggs
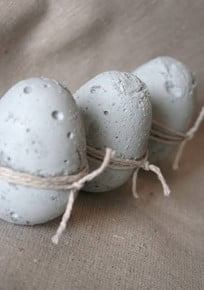
It is not just for Easter decoration; you can plan them on other festivals’ decorations also. Use old plastic food cups to make the mixture, add enough water until the consistency becomes thick like a milkshake, then scoop out the mixture into both halves of the plastic egg.
Then make the eggs shut and shake them, and allow them to dry for a few hours. It is dried, with a knife apart from the egg and the eggs with fine sandpaper.
And it has done! When you pick them up, they feel to be heavy but are perfectly oval. You can paint them as well. Most durable and perfect for decorating.
Gold Dipped Concrete Earrings
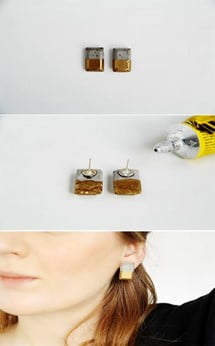
You can also make earrings from concrete. Have you thought about it? It would help if you had liquid gold gilding, masking tape, concrete gemstones, earring posts.
How to make it? Mix concrete to a much thicker consistency as it will give gemstone shapes a much stronger finish. Tape half of the concrete gemstone press the edges to prevent air bubbles. The exposed section of concrete is painted, let it dry, then slowly remove the masking tape. Then glue to the back of stone your earrings and leave them for drying.
And it has done! These earrings are elegant and comfortable with making and made from concrete. It looks so simple and adorable.
Hand Blown Concrete Garden Bowls

All are rounded with different sizes, but the opening is unique in each bowl, causing them to glow differently. Mold them in round domes and leave a hole on top of each bowl so that candles can be put inside them. Paint them as per your choice.
Perfect for enriching the garden area’s glow, and act as a source of entertainment with tealight candles.
Concrete Paver House Numbers
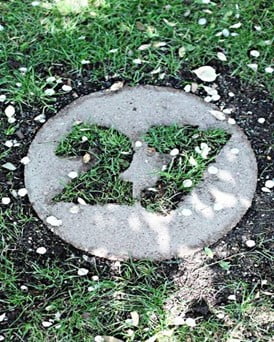
You do not need to go out to buy pavers that contain your house numbers. You can make it by yourself and can save money. Prepare a cardboard tube by doing several coats, stuck the tube to the back of an old door with the help of duct tape, and hot glue the numbers to prevent their shifting.
Mix the concrete in a bucket. Make sure to make the mixture slightly watery so that it is easily pourable. Then carefully fill around numbers. Cover with chicken wire, a little bit of shaking is done. Dry for 36 hours covered in plastic. Flip it and, with the help of a knife, take the numbers out.
It has been done! Transplant some grass into numbers and surround it with tiny pebbles. It will remain entirely in place.
Concrete and Lace Bookends
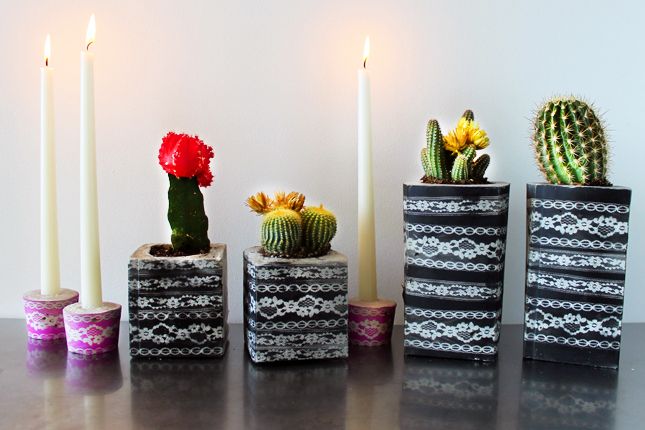
Combine the look of concrete with lace, and see the new art coming up. It would help if you had three cement boxes, lace trim, paper cups, a disposable mixing bucket, stirring stick, paint (spray), acetate (4pieces), milk or juice cartons.
How to make it? Cut the top of 2 cartons. Cutting should be even and straight. Use two paper cups and press them into the cement to act as a hole for the plant. Make concrete mixture, add more water till the consistency becomes like cake batter.
Pour the concrete into the carton till it becomes full, tap the carton so that concrete is settled. After that, place a piece of acetate on top, make the whole thing upside down, and dry it for one hour. When dried, peel the carton off and wrap it with lace, securing it with tape. Spray with paint.
And it has done! Now, all books look neat and tidy. This DIY concrete idea is gorgeous and easy to make.
Concrete Letter Picture Holder

A personalized DIY concrete project idea and a wonderful gift to give on some occasion. What do you need? Quick-dry concrete, silicone symbol tray, silicone letter tray, gold wire, foam brush, neon paint, jewelry pliers, tape.
What to do? Photo holder is created with wire. A small triangle is bent and surrounded by a large triangle with the help of jewelry pliers. Next, the wife’s other end is bent, and the letter’s top is tape.
Mix water and concrete in a bowl. The mixture should be puddy. Once it is ready, pour in the letter mo to sit for 20 minutes, then peel the mold. Bending of wire is done so that it can stand straight. Add color with the help of a foam brush, allow it to dry for 30 minutes.
Add photos and done! Easy to make and fun giving. You can create any personal message and can give it to anyone as a gift.
Conclusion
All these DIY concrete ideas are superb and easy to make. Things needed to make these crafts are available in the home only.
All these crafts are so entertaining that you cannot get bored. There are many more things which can be made from concrete.
But while making these DIY concrete crafts, protection should be taken. All these crafts can be used as gifts, and they enhance the beauty of the home, indoors and outdoors.
So, keep making these and keep flourishing your brain with many new ideas.


Comments