
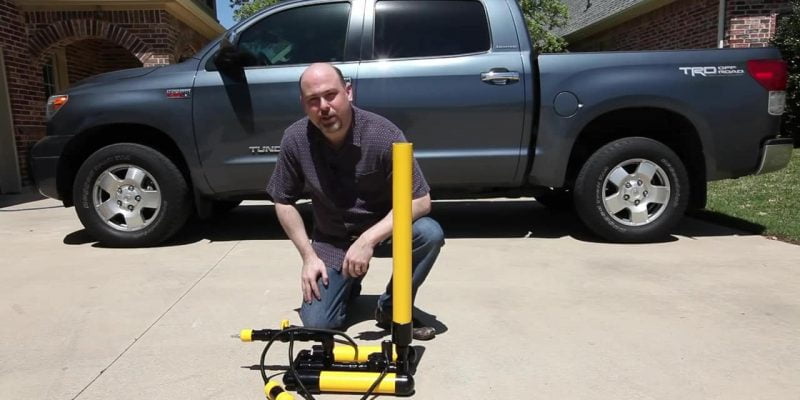
A Water Balloon Cannon is considered an awesome thing around in summers. It is very popular among kids as they love to play water balloon drop games. It is even a beautiful addition to the Halloween setup.
In this guide, we will discuss a step-by-step guide to build your own DIY Water Balloon Cannon. You will need a lot of materials to make this cannon and all of them can easily be gathered from any local hardware store. So, let us jump onto the guide.
Steps to Make a DIY Water Balloon Cannon
Materials Required:
1 2″ SCH 40 Pipe, 1 1″ SCH 40 Pipe, 2 2″ Caps, 2 2″ Couplers, 3 2″ to 1″ threaded reducers, 3 1″ threaded to 1″ adapter, 1 1″ elbow to threaded 1″ elbow, 2 1″ Tee 1 1″ threaded sprinkler valve, 1 1″ 90 degrees elbow 1 1″ ball valve, 1 Air compressor quick adapter, 1 2″ Coupler 2 1″ caps, 1 Momentary switch, 1 25 ft doorbell wire, 1 plastic wire wrap, 1 Yellow High Gloss, 1 Black High Gloss, 1 Pipe Primer, 1 Pipe Glue.
You can easily find each of them in a local hardware store.
Step 1: Cutting the PVC
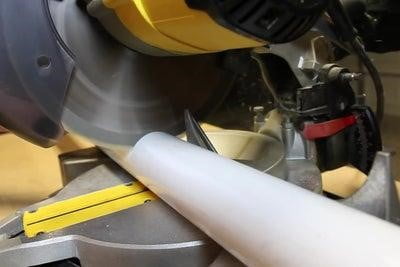
Firstly, you must mark all the sections of PVC where you want the cuts. For cutting the pipes, it is recommended to use a handsaw. It is recommended to be calm and steady while cutting the PVC as they are prone to fracturing.
Step 2: Fitting it All Together.
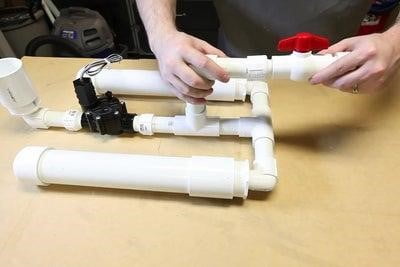
Dry Fit all the components together and check if every component is correctly fixed or not. It is easier to replace wrong fit components currently.
Compressed air is not required at that time.
Step 3: Installing Air Inlet
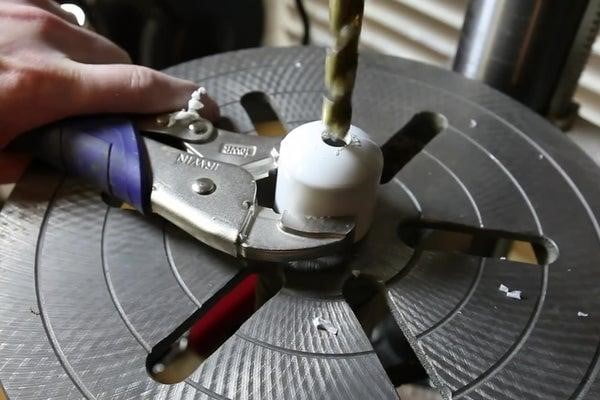
To install the Air Inlet, you must drill a small hole behind the off valve, you must make sure that it is slightly smaller than the threads on your quick fitting. Now, you must remove the PVC pipe tape and again reinstall it to complete the air fill and make it completely leakproof.
Step 4: Glueing the PVC Components
To glue all the components, it is recommended to use the standard PVC primer and PVC cement. You must be very careful while gluing all the components and make sure you do not make any mistakes here.
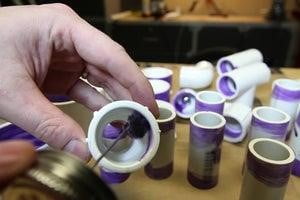
Step 5: Wiring the Detonator
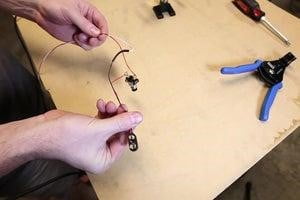
If you are skilled enough then you can use a soldering iron, otherwise, you can also twist the wires in the detonator and wrap them with electrical tape. Then, you must drill a hole in both the caps, one hole is for the switch, and another is for passing the wires. Place the 9V Battery to one end of the sprinkler valve and you must make sure that you do not glue the detonator as you need to replace the battery in the future.
Step 6: Painting all The Components.
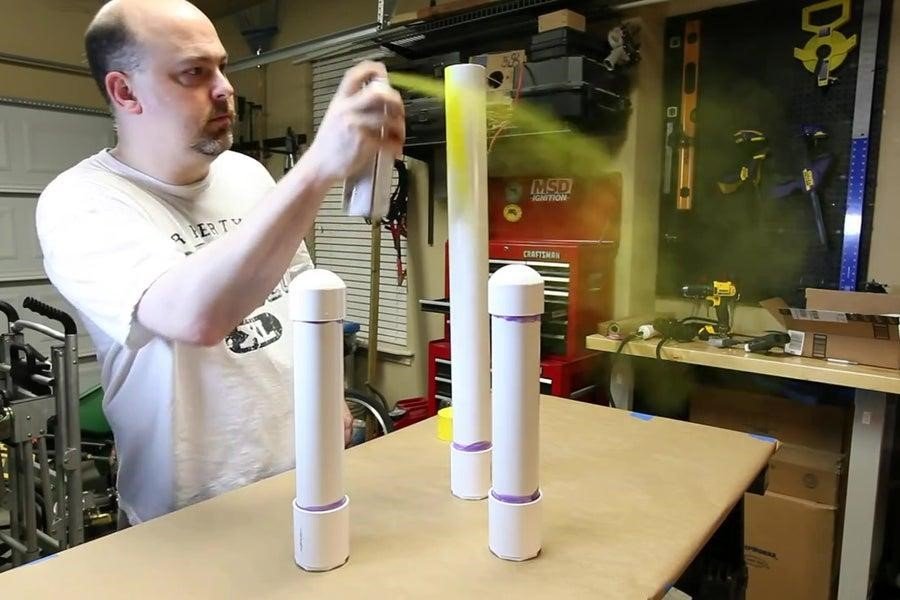
It is upon you if you want to make your Cannon look more attractive then you can paint it. Paint the entire cannon with your favorite color and let it dry overnight. Once the paint is dry and all the components are correctly glued then you can reassemble everything using the pipe thread tape.
Step 7: Let It Try
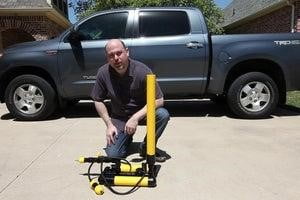
Now, it is time to fire the water balloon cannon, fill the cannon with compressed air, and keep the value between 80 and 100 PSI. Fill the water balloons in the cannon and if they keep on bursting before leaving the cannon then you must reduce the air pressure.
Final Words
Creating a Water Balloon Cannon is not a difficult task, but you must be very careful while gluing all the components. All the materials required in this DIY project are easily available in the market.
Well, this is all about this project, if you like this one, then please check out our other projects. If you have any questions regarding this guide, then feel free to ask by commenting down below.


[…] the question arises: What do you do when you do not have enough water balloons to put in your water balloon cannon? Can the normal balloons be used as water balloons? And the answer is […]
[…] the self-sealing water balloons instead of throwing standard rubber balls. Here, use your hand as a water balloon cannon. If the water ball hits a player, he is out of the […]
[…] is essential to assess your specific situation when deciding whether to fill water balloons for a water balloon cannon the night […]
[…] device called a radiosonde, usually expendable. When exploring the various types of balloons, like water balloon cannons, helium balloons, and round ones, it is natural for one to reach weather balloons and read more […]
[…] way, kids love playing with balloons of all sorts, whether it is a water balloon cannon, a normal balloon, or a helium […]