
Are you interested in going solar but don’t know where to start?
Installing solar panels can seem like a daunting task, but it’s actually a lot easier than you think!
In this blog post, we will walk you through the steps of installing solar panels on your own.
We’ll provide tips and advice along the way, so you can feel confident about taking on this project.
Ready to get started? Let’s go!
Step #1: Consider your energy consumption
When it comes to choosing a solar energy system for your home, there are many important factors to consider.
First and foremost, you need to think about what your specific needs and goals are with respect to your energy use.
Some homeowners may only need to power a few key appliances or electronics, while others may require a full-scale system that provides energy for the entire household.
In addition, you will also need to think about whether you want your system to be connected to the main power grid or operate independently from it.
Ultimately, the ideal system design for your home will depend on a variety of factors, including your budget and energy usage needs.
However, no matter which option you choose, it is clear that solar energy has many benefits for homes of all sizes and types.
If you’re in Melbourne and don’t want to do a DIY installation
No worries!
You can start by looking for a well-experienced solar company like In Style Solar and find out more about solar panel installation in Melbourne.
Step #2: Buy solar power system components and equipment.
When it comes to buying solar power system components and equipment, there are a few different things you’ll want to keep in mind.
Specifications like energy efficiency and warranty length may be used to evaluate different solar panels, batteries, and inverter products.
This is important because you’ll want to make sure you’re getting the most bang for your buck – after all, solar energy is a big investment.
But don’t worry, doing your research ahead of time will pay off in the long run.
And once you’ve made your decision, you can sit back and enjoy the clean, renewable energy your solar panel system provides.
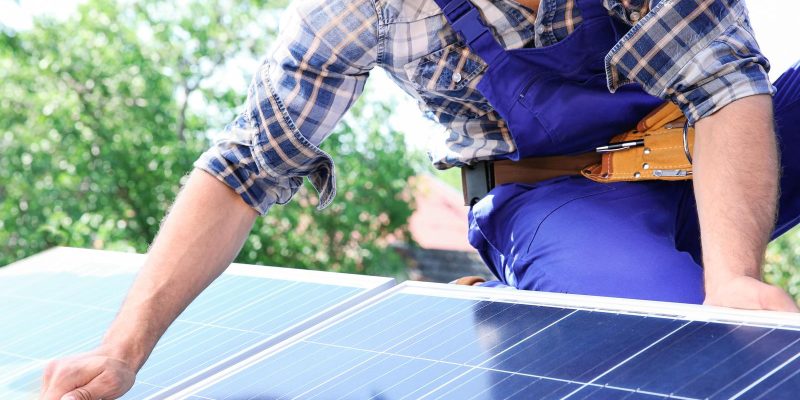
Step #3: Install the panel racks or mounts on your rooftop
When installing a rooftop solar power system, it is important to start out by carefully planning the layout of your equipment and ensuring that you have all the necessary permits and hardware in place.
This includes installing your roof-mounted racking and mounting equipment, which typically involves drilling holes and applying caulk or other sealants to keep water out.
Once you have determined the best placement for your panels, you can begin bolting them securely into place, taking care to ensure that they are properly aligned and level and don’t get them above your patio or else you lose the luxury.
With the right preparation and planning, you can set yourself up for a successful solar installation project from start to finish.
Step #4: Install the microinverters and connect the panels to them.
To install a solar panel system, the first step is to install the microinverters. These components control the output of each individual solar panel, and they must be attached securely to the panel in order to function properly.
While installing the microinverters, it is also important to attach a grounding wire between the rails to provide protection against lightning strikes or other electrical disturbances.
Once these steps have been completed, your solar panel installation will be ready for use!
Step #5: Contact your utility company and seek permission to turn it on, if required.
After you’ve installed your solar panel and system, it’s important to schedule an inspection with your local utility company. This inspection will ensure that your system complies with local legislation.
Once you pass the inspection, you’ll be able to connect to the grid and start exporting electricity. The local utility will provide a meter to record your electricity exports.
Step #6: Install a monitoring app
After obtaining the proper approval, it is important to carefully check your solar system using a monitoring app.
This will allow you to monitor the performance of your system and make any necessary adjustments in order to ensure that it is functioning as expected.
By doing so, you can help to maximise the efficiency and effectiveness of your solar system, ultimately allowing you to save money on energy costs over time.
So if you’re looking for a simple way to ensure that your solar system is performing at its best, be sure to use a monitoring app whenever possible.
With just a few quick steps, you can take control of your energy usage and start enjoying all the benefits of renewable power!
Final Words
Now that you know the basics of installing a solar panel system, it’s time to get started on your own project!
By following the steps outlined in this article, you can make sure that your solar installation goes as smoothly as possible.
Just be sure to do your research ahead of time and plan accordingly – with a little bit of preparation, you can sit back and enjoy the clean, renewable energy your solar panel system provides.


Comments